Latest Posts
April 24, 2024We all have fears and concerns about getting outdoors. Some of these I struggle from and others are from talking with you all our outdoor community. We have put together a list of five things that we hear people are most concerned about when going on solo adventures. These fears and concerns should not keep you from getting outside. Instead, we have put together some great ways to help. 1.  Lions, Tigers, and Bears… oh my! Everyone has heard of the horror stories of people being attacked but what is not always spoken about is most people who see bears, mountain lions, and other potentially dangerous animals do not have dangerous encounters.  Yes your heart might skip a beat and your adrenaline will be pumping but a simple “HEY BEAR” will startle them and they will head in the other direction. As long as you are aware of your surroundings, researched the area, and have the appropriate gear there is no need to use “dangerous” animals as an excuse to not go to those places you have always wanted to go. A few tips for those who might be a little anxious. Talk or Sing out loud when you are concerned. Animals will hear your noise and stay away from you. Carry Bear Spray and know how to use it. Do not spray yourself in the face instead of the bear. Keep your food out of your tent and use the bear vaults or properly store your food in the backcountry. Speak to the local ranger or staff at the welcome center about sightings and suggested practices. Research on the internet before going. Many times you can find warnings and alerts prior to arriving. Give the animal space it is a wild animal after all and you are just as weird and scary to them. 2. Being Alone If you are like me, you would much rather join up with friends and head off on an adventure. Sometimes that is not always possible or you just want to spend some time alone. No matter how big or small heading off on a solo adventure of any kind is always hard for anyone. Lots of unknown factors and “what ifs” to consider but you should not let those get in the way.  “The journey of a thousand miles begins with one step.” –  Lao Tzu. Grab your pack or load up the car and head off on your own. Some of my greatest adventures have been alone. Here are a few handy tips that I have found that have helped along the way. Talk to people, learn their stories, and be kind to them. You are just as much of your life story as you are of theirs now. ] Your Imagination can be both a strength and a weakness. Not every noise in the dark is out to kill you. Stay cautious and curious. Be flexible!  Have backup plans and be ready to use them.  Alternative plans can also mean being able to rearrange your days for weather or sudden issues. Tell someone about your plan.  Always keep someone in the loop of what you’re going to be doing.  Give them your backup plans, and if possible keep in them in the loop any time you have an available signal. Keep your important docs, ID, cash in a safe place. Know your plans inside and out.  Spontaneous events happen, and that can be fun, but know your plans.  Be prepared, know the routes, and do a little research 3.  Try New Things Jumping from rocks into the river below, new food, or really anything. It is very easy to say no but much harder to say yes. We have all had those moments where we have almost said no but then we change our minds and try it anyway. Normally it is friends, family, or travel companions that make it easier by going first. When you are traveling solo there is not always someone to go first. Be cautious and careful you are the only one that can make or break your trip. Know your limits. Getting in above your head never ends up with a happy ending. It is ok to say no thank you if you do not feel comfortable or you do not like what is being presented to you. Be skeptical but optimistic. It is ok to go outside of your comfort zone every once in a while. Having an open mind about having a new experience and trying new things will allow you to have more fun. Life is all about the things you did not about the stuff you collected. 4. Go To New Places We all have our favorite local spots. Campsites, hiking trails, drives, you name it. Going outside of your comfort zone by going someplace else opens you up to enjoy many new experiences and adventures. Drive a little further, pick a location on a map and go, make a point to find new places even within your backyard. Pull out a map or visit Google Maps and start finding spots! Research the locations and start planning. What will it take to get there, what gear do you need, etc. Lists are your friends. Talk to friends social media or IRL and ask for people’s advice while visiting the locations. The research can be just as fun as the actual trip. 5. Keeps Your Skills Sharp  If you travel often you always need to keep your skills sharp. Learning new things is also important as well. Learning how to read maps, know what gear you need, and even information about your destination can be extremely helpful. We have all heard that learning new on a regular basis is important but relearning things is also just as important. You might have learned a skill many years ago such as first aid. If you have not practiced it regularly it will still be there when you need it but it might get a little rusty. Watch videos, go to training courses, or even simply have a friend show you how to do something again can help. Here are a few courses and or skills that might come in handy. Learning how to use a compass and how to read a map. (Orienteering) First Aid Basics and Wilderness First Aid. Learn Another Language Learn Literally anything on Youtube  The next time you decide on going on a solo trip use these suggestions to help you get out there and have an adventure. Good luck and happy travels! [...] Read more...
April 22, 2024Itโ€™s another brilliant day, and the trail beckons. Whether youโ€™re heading out for a gentle hike or tackling a rigorous trek, one companion you should never underestimate is the sun. Much like you wouldnโ€™t venture out without a map, going unprepared without sun protection is a risk not worth taking. So, letโ€™s talk about how to keep your skin safe under the sunโ€™s enthusiastic rays, ensuring that the only thing you bring back from your adventure is good memories. 1. Choose the Right Sunscreen First things firstโ€”sunscreen is your best friend on the trail. Opt for a broad-spectrum sunscreen with an SPF of at least 30. Remember, high altitudes and reflective surfaces like water or snow can increase UV radiation, so you might need a higher SPF. Apply it generously on all exposed skin, and donโ€™t forget areas like the back of your neck, ears, and the tops of your feet. Reapply every two hours, or more often if youโ€™re sweating heavily. 2. Wear Protective Clothing Covering up is a chic and effective way to fend off UV rays. Invest in lightweight, long-sleeved shirts and pants. Many outdoor apparel brands offer clothes with built-in UV protection, which can be a game-changer on sunny days. Don’t forget a broad-brimmed hat to shield your face and neck, and UV-blocking sunglasses to protect your eyes. 3. Time Your Hikes Wisely Timing is everything. The sun is most intense between 10 a.m. and 4 p.m., so planning your hikes for early morning or late afternoon can reduce your exposure to harmful UV rays. Not only will you beat the heat, but the softer light can make for stunning photosโ€”a win-win! 4. Seek Shade Whenever Possible While itโ€™s not always possible to hike in shaded areas, take advantage of shade whenever you can. Planning your route around shaded trails can be a skin-saver, especially during the hotter parts of the day. And if youโ€™re taking breaks, look for a nice spot under a tree or rock outcropping. 5. Stay Hydrated Hydration doesnโ€™t just keep you energizedโ€”itโ€™s also essential for maintaining healthy skin. Dehydrated skin is less effective at defending itself from the sunโ€™s rays. Make sure to drink plenty of water before, during, and after your hike to keep your skin hydrated from the inside out. 6. Be Mindful of Reflections Be extra cautious around surfaces that reflect sunlight, such as water, snow, and even sand. These surfaces can significantly increase your exposure to UV rays, making sunscreen reapplication and protective clothing even more critical. 7. Use Lip Balm with SPF Your lips are vulnerable to sunburn too, often overlooked in sun protection routines. Use a lip balm with SPF protection and reapply as you do your sunscreen. This will help prevent chapped and sunburned lips. 8. Monitor Your Skin Keep an eye on your skinโ€™s condition throughout your hike. If you notice any redness or feel your skin burning, itโ€™s a signal to seek shade and reapply sunscreen. After your hike, continue to monitor your skin for any signs of sunburn or unusual changes. Sun safety is an essential part of outdoor adventures, often overlooked until it’s too late. By integrating these sun protection strategies into your hiking routine, you can enjoy the trails without the worry, keeping your skin as healthy and happy as your spirit feels while roaming the great outdoors. Happy hiking, and stay sun-safe out there! [...] Read more...
April 12, 2024Ah, the great outdoors! Whether you’re pitching a tent under the stars, conquering the next ridge, or cruising down the highway with your favorite tunes, there’s no doubt that being prepared with the right kind of nutrition can make or break your adventure. Just as we prep our gear with meticulous care, the food we bring along needs the same thoughtful attention. Here’s how you can keep your stomach full and spirits high, no matter where your travels take you. 1. Plan Ahead and Pack Smart Before you hit the road or trail, planning is paramount. Think meals that are not only easy to carry but also easy to prepare. Dehydrated meals come in handy while camping and hiking, offering lightweight packing without compromising on nutritional value. For those road trips, consider pre-made sandwiches, salads, or wraps that can easily be packed in a cooler. 2. Hydration is Key Itโ€™s easy to get caught up in the excitement and forget about hydration. Whether you’re scaling up a mountain or navigating through traffic, water is your best pal. Carry a refillable water bottle and consider packing a portable water filter for longer outdoor excursions. And for a bit of flavor? Squeeze some fresh lemon or throw in a few berries to make it more enjoyable. 3. Focus on Nutrient-Dense Foods When youโ€™re out in the wild or on the road, your body needs fuel that packs a punch. Nuts, seeds, and dried fruits are great for a quick trail mix. Lean proteins like jerky or hard-boiled eggs can keep your energy levels up. And donโ€™t forget your veggies โ€“ carrot sticks and bell peppers are crunchy, refreshing, and full of the vitamins you need to keep going. 4. Keep It Simple and Safe Remember, the goal is to enjoy your adventure without a hitch. Simple cooking methods like boiling or using a portable camp stove can save you time and hassle. Always pack foods that require minimal preparation and can be safely stored. For instance, canned beans or tuna can be a fantastic base for a quick meal, just be sure to bring a can opener! 5. Treat Yourself Whatโ€™s an adventure without a little indulgence? After a day full of activities, a small treat can be the perfect cap to an evening. Dark chocolate, a piece of fruit, or even a s’more if youโ€™re by a campfire, can be delightful. Remember, itโ€™s all about balance. 6. Mind Your Meals on the Move Eating while moving, especially on road trips, can be tricky but manageable. Pack snacks in easy-to-reach places so you arenโ€™t rummaging through bags while driving. If you’re hiking, use snack breaks as an opportunity to rest and enjoy your surroundings. Mindful eating will enhance your experience and help you tune into your bodyโ€™s hunger cues and needs. 7. Leave No Trace It goes without saying, but keeping our wild spaces pristine is a responsibility that falls on all adventurers. Pack out what you pack in, including food waste and wrappers. Being considerate of nature not only preserves it for future explorers but enhances your connection to the environment. Fueling your body right is crucial to getting the most out of your adventures. With a little preparation and some smart packing, you can nourish your body, delight your taste buds, and keep the wheels turning towards your next great journey. Happy travels! [...] Read more...
April 10, 2024Your bags are packed and your route all mapped. Do you ever feel like you are forgetting something as you close and lock your door? Here are five areas that you may or may not have thought about adding to your trip planning logistics. 1. Weather, environment, and elevation. How many times have you checked the local weather packed for that weather and headed off? Once you get there you realize that you will be climbing a mountain and you only packed your summer gear and it’s going to be a little chilly up there. Maybe you did not pack enough rain gear for a very wet outing because of afternoon showers brought on because of the monsoon season. Knowing weather patterns, environmental patterns, terrain, and elevation before you go is key to planning trips. Knowing this type of information you can properly pack for the conditions and by being prepared in advance have a much better time instead of battling the elements.  Andrew Skurka professional hiker extraordinaire talks about this very thing in his talk about Trekking the Wild north for National Geographic. You can watch his speech here.   Skurka says that he even goes as far as looking at the weather patterns from the past several years in the area to help him be more prepared.  Have you done this or how do you prepare for your adventures? 2. Passports, Passes, Permits, and Paperwork. Have you created a list of all the paperwork that will need to be done before you head off? Will you be leaving the country at any point and will need a passport? Will your adventures require any special transportation visas, or special passes to allow you to travel through that section of the country? Did you get a camping permit even though you paid your entrance fee into the national park? These are just several of many questions that you might consider asking yourself before you even start to pack your bags.  Depending on where you are going and for how long may cause a headache from the paperwork alone. The best way to figure out what paperwork is needed is to head to the internet and spend some time researching. Guide books are also a valuable resource that will give you more than just information on trip preparation. Another good way is to talk to people who have gone on a similar trip or have been through those areas you want to explore.  Another great option is to call up a local travel agent or embassy of the country you are traveling to and set up a meeting to discuss your plans. They will have lots of information for you as well as documentation for trips just like yours. It never hurts to have more information than you need. How have you done the research for your trips? 3.  Shots, Medications, and Physicals. Depending on where you are going they may require you to have special vaccinations before ever leaving your home.  It also would not hurt even if you do not need any special vaccinations before your trip to go and get a full health physical done. Just to make sure there are no issues that may need to be attended to before leaving. Also, this will allow you to make sure that your vaccinations are up to date as well as allow the doctor to provide you with enough medication for your upcoming trip.  If you take medications at all having plenty on your trip will be very important. How do you plan on supplying yourself with your medications and do you have any emergency plans in case you run out or can’t get to a pharmacy? 4. Insurance.   What kind of insurance do you travel with? There are lots of different types of insurance and lots of different places you can get it from. In my opinion, the most important insurance to have is emergency health. Emergency health is pretty self-explanatory. In the event you have to be pulled from a mountain by helicopter or taken to the emergency room most Emergency health insurance can cover it. It can also cover any unexpected medical costs you may encounter during your trip.  The next one would be either ticket/trip insurance or luggage insurance. Never know when your cruise might be canceled because of a hurricane.  You also never know when the airlines might lose or damage your gear. If you are flying, on a cruise, or with a tour group, many of the packages have insurance included in the travel package.  Just because they have it does not mean it is always the best or the cheapest. Spend some time looking over what they offer and see if you can find your own at better prices or with better offerings. Never settle for what’s there because it might not always be best for you. 5. Wills and Power of Attorney. When going on any kind of extended journey one might consider either getting a will or revising your current will and power of attorney if you already have one. If you are not familiar with what a will does it allows you to provide instructions on how you wish things to be completed upon your passing or if you are unable to take care of yourself due to injury during hospitalization. Wills are a bit more complicated than that but if you want more information about them I would talk to your lawyer.  The other important setting is the Power of Attorney.  Power of Attorney allows people whom you choose to act on your behalf if you are unable to. You can be as detailed or generic as you wish. I highly recommend talking to an actual attorney about these types of items because it is imperative that you have them completed correctly for those who would be taking care of you. There are many ways to accidentally skip over items because the right questions were not asked.  It opens the door to many “what if” questions and can begin to look very daunting.  Taking the time to speak with a lawyer will help you answer these questions and complete these important documents correctly. It will also help those who might be helping you if an emergency does occur. What do you do to plan for your trips? What other suggestions do you have for others who are planning trips?     [...] Read more...
April 8, 2024The freedom to explore the world without sacrificing your career is one of the most liberating experiences offered by remote work. Car camping or overlanding offers a unique blend of adventure and productivity, but it requires a bit of preparation and know-how to ensure you stay connected, secure, and powered up. Hereโ€™s your guide to navigating the remote work road, ensuring that you remain as efficient under the stars as you are at your home office. Staying Connected Wi-Fi, Starlink, and Cell Phone Signals The cornerstone of remote work is a reliable internet connection. While out in the wild, you have a few options to stay connected: Wi-Fi: Some campgrounds offer Wi-Fi, but the quality and reliability can be hit or miss. Before settling in, check reviews on platforms like Campendium or iOverlander for insights on connectivity. Starlink: SpaceX’s Starlink has been a game-changer for remote workers, offering high-speed internet in the most remote locations. It’s an investment but well worth it for those relying on a solid connection. Cell Phone Signal: Utilizing your phone’s hotspot can be a straightforward solution, especially if youโ€™re in an area with good coverage. Investing in a cell phone signal booster such as a Weboost  Overlander can extend your range significantly. Security with a VPN Connecting to unprotected networks can put your data at risk. A Virtual Private Network (VPN) encrypts your internet traffic, keeping your online activities secure from prying eyes. Whether you’re accessing a campground Wi-Fi or tapping into your hotspot, a VPN is essential. Services like NordVPN or ExpressVPN are reliable choices, offering robust security features tailored for remote workers. Choosing a Campsite When your work depends on connectivity, choosing the right campsite becomes more than just about the view (though thatโ€™s important too!). Hereโ€™s what to consider: Signal Strength: Use apps like OpenSignal or Coverage? to check the cellular coverage of potential campsites. Proximity to Amenities: Being close to towns or rest stops can offer alternative internet options, like cafes or libraries. Devices to Boost and Diversify Your Connection Relying on a single internet source is a gamble. Here are a few devices to keep you online: Signal Boosters: Enhance your cell phone reception with a signal booster designed for vehicles. Wi-Fi Extenders: If youโ€™re relying on campground Wi-Fi, a Wi-Fi extender can strengthen your connection. Dual SIM Phones or Hotspots: Devices that can house multiple SIM cards from different carriers ensure you can switch if one network goes down. Keeping Your Devices Charged Power is just as crucial as your internet connection. Hereโ€™s how to ensure your devices never run out of juice: Solar Panels: Portable solar panels are a sustainable option to keep your gadgets charged. Power Banks: High-capacity power banks can keep your devices running for days. Vehicle Inverters: Convert your vehicleโ€™s DC power into AC to charge laptops and other high-power devices. In the grand scheme of things, working remotely while surrounded by nature is an unparalleled experience. With the right tools and preparation, you can transform any campsite into a productive workspace, all while enjoying the freedom of the open road. Stay connected, secure, and powered up, and the world becomes your office. Happy trails and productive workdays to you! [...] Read more...
April 6, 2024Embarking on a day hike brings with it the allure of uncharted trails, breathtaking vistas, and the pure joy of being one with nature. However, the difference between a day filled with awe-inspiring moments and one that tests your limits lies in two critical aspects: preparation and knowledge. Let’s venture into the essentials of day hiking, ensuring your journey is both exhilarating and safe. Research & Navigation: Charting Your Course The cornerstone of any successful hike is thorough research and navigation planning. Understanding the ins and outs of your chosen trail can transform your hike from daunting to doable. Start by confirming the route details, identifying your starting point, and setting realistic goals based on your endurance level and hiking experience. For insights and advice, your local REI is a treasure trove of information. Additionally, tapping into the knowledge of park rangers and utilizing online resources can provide you with a clearer picture of what to expect. In the digital age, the trio of a reliable GPS, compass, and physical map remains your best ally against the unpredictable. Remember, a snapshot of the trailhead map on your phone can be a navigational lifesaver. Apparel: Dressing for Success on the Trail The saying “Dress for the job you want” surprisingly applies to hiking as well. Your attire can significantly influence your comfort and safety throughout the hike. For a comprehensive guide on layering, Backpacker.com offers a deep dive into selecting the right base layers, insulation, and shells. Opting for materials like wool and synthetics can provide the perfect balance between warmth and moisture-wicking properties. As the seasons change, so should your hiking wardrobe. Summer hikes call for clothing that offers sun protection, breathability, and flexibility. Items with cargo pockets and mesh vents are not just functional but can enhance your overall hiking experience. Footwear: Picking the Right Path for Your Feet The debate between hiking boots and shoes is ongoing, but the right choice largely depends on the nature of your hike. SierraTradingPost.com recommends considering factors such as distance, terrain, and weather before making a decision. For light trails and short distances, trail shoes offer an ideal combination of support and breathability. Conversely, for challenging terrains and longer hikes, a sturdy pair of hiking boots provides indispensable protection and support. Hydration: The Essence of Endurance Never underestimate the importance of hydration, especially in the great outdoors. TheHikingLife.com suggests planning one liter of water per hour in demanding conditions. Equip yourself with reliable water bottles or a hydration system, and don’t forget a water filter for those long stretches away from civilization. Sun Protection: Your Shield Against the Elements Protecting your skin from the sun’s rays is crucial, especially during prolonged exposure. Opt for sports-specific sunscreen with high SPF and consider skincare products that offer anti-aging properties to combat the effects of UV radiation. Accessories like a brimmed hat and UV-protective clothing can provide additional layers of defense, keeping you safe and comfortable as you conquer the trails. Embarking on a day hike is an adventure that promises rich rewards for those who come prepared. By equipping yourself with the right knowledge, gear, and mindset, you’re not just setting out on a journey through nature; you’re stepping into a realm of personal discovery and unforgettable experiences. Happy trails! [...] Read more...
April 5, 2024Stepping into the wilderness on your own terms is an adventure that whispers to the soul, promising both the balm of solitude and the thrill of autonomy. Itโ€™s a choice that dances on the edge of freedom and vulnerability, offering a canvas as vast and varied as the trails that wind through the heart of nature. For those whoโ€™ve tasted the quietude of a solo trek, the call of the wild is a personal serenade, a journey not just through the forest, but into the self.’  The Sweet Solace of Solo Hiking 1. The Luxury of Unfettered Freedom: Thereโ€™s something inherently liberating about setting your own course, untethered by the preferences or schedules of companions. The trail becomes your oyster, ripe for exploration at the whim of your own curiosity and pace. Itโ€™s a solo symphony, where each step is a note played at the exact moment you wish, composing a melody of movement thatโ€™s entirely your own. 2. Marching to the Beat of Your Own Drum: The rhythm of your hike is yours to define when youโ€™re the sole traveler on your path. Thereโ€™s a unique kind of peace in moving exactly how and when you want to, allowing for a deeper immersion into the natural world that surrounds you. Each breath, step, and heartbeat aligns with the natural order around you, unencumbered by compromise. 3. Encounters of the Wild Kind: Alone, you become part of the landscape, blending into the fabric of the wilderness with a subtlety that invites the shyest of creatures to venture closer. Itโ€™s in these quiet moments of solitude that nature reveals her secrets, offering glimpses of beauty and survival seldom seen amidst the clamor of a crowd. The Shadow Side of Hiking Alone 1. Solo, But Not Always Safe: The flip side of solitude is vulnerability, a stark reminder that in the wilderness, you are but a guest. From the unpredictability of wildlife to the rare but real risks posed by fellow humans, going it alone means having only yourself to rely on should challenges arise. A blade for protection, a whistle for signaling, and a heart braced for the unforeseen are the solo hikerโ€™s companions. 2. The Path Less Known: Venturing solo means navigating the way forward without the collective wisdom of a group. The burden of decision-making rests squarely on your shoulders, with each choice echoing more profoundly in the silence of solitude. A misread map or a technological glitch can transform an adventure into an ordeal when backup is miles away. 3. In Solitude, Every Challenge Is Yours Alone: The wilderness cares not for the number of its audience. A twisted ankle or a sudden illness can escalate from inconvenience to crisis without the safety net of companionship. Preparedness becomes not just a virtue but a necessity, with each scenario played out in the theater of oneโ€™s mind before setting foot on the trail. The Solo Trek: A Journey Within To hike alone is to engage in a dialogue with the self, against the backdrop of the earthโ€™s raw majesty. Itโ€™s an exercise in trust, in courage, and in the quiet joy of oneโ€™s own company. As you lace up your boots and set out, remember that the journey is as much about exploring the inner landscapes as it is about the miles traversed underfoot. Embrace the solitude, prepare for the challenges, and let the trail teach you its lessons. After all, the paths we choose to walk, both literal and metaphorical, shape the stories we tell and the selves we become. In the embrace of nature, find your pace, find your peace, and perhaps, find a little piece of yourself along the way. Get stories and posts before they are posted here on the site by signing up for the email newsletter. Follow me on Instagram and Facebook. You can also find fun stickers and more from the places we all love at my Etsy shop. [...] Read more...
April 4, 2024Some of us get to enjoy a fun filled adventurous summer while the rest are chained down to a desk working while we watch as others post awesome photos of their trips and adventures on Instagram. Instead of living through a screen why not pick up a book or two. Here is a great list of five adventure travel books that will have you laughing. crying, and joining the adventure. The Yellow Envelope: One Gift, Three Rules, and A Life-Changing Journey Around the World Author: Kim Dinan Kim and her husband decide to quit their jobs to travel the world, they’re given a yellow envelope containing a gift of money and directions to give the money away. They are instructed to follow three rules: Don’t overthink it; share your experiences; don’t feel pressured to give it all away. Kim and Brian face obstacles, including relationship challenges to their relationship, travel faux pas, and internal struggles as they travel through Ecuador, Peru, Nepal and beyond. Along the way they pay it forward to people and organizations, learning that sometimes the hardest thing to do is give of oneself transforming them as humans and individuals. This book is a must read for the uplifting story and adventures that are had along the way. Plus they even give you a great way to carry on the tradition of the Yellow Envelope. Get your copy of The Yellow Envelope Today!   Funny Shit in the Woods and Other Stories: The Best of Semi-Rad.com Author: Brendan Leonard A collection of 40 of the most popular stories from our favorite outdoor blog Semi-rad.com written by Brendan Leonard. You will find yourself laughing until you cry learning about mishaps, dangerous sports, and new love interests. Complete with illustrations drawn by the rad dude himself. This is a great read for those who love and enjoy the outdoors. Watch out though you might find yourself having to apologize for loud laughing outbursts if read in public. Also, it has been known to travel around friend circles and never coming back if loaned to friends. It will have you relating to the stories with those “Been there done that” moments as well as learning a few things also. Get your copy of Funny Shit in the Woods!   The Last Season Author: Eric Blehm The Last Season examines the remarkable life of legendary backcountry ranger Randy Morgenson and his mysterious disappearance in California’s unforgiving Sierra Nevada Mountains. Randy was a tough and smart as they come. He was the epitome of a backcountry ranger. Randy was a National Parks Ranger who preferred his backcountry assignments. His mysterious disappearance in the 1990’s leads to one of the largest searches ever conducted by the National Park Service. The story is an amazing account of what life as a backcountry ranger is like, the search for Randy, and the stories leading up to what was found. Find out if they found Him!   Car Camping Author: Mark Sundeen Car Camping is a road trip novel like no other.  Mark is 22 and searching for his purpose in life. Mark’s travels take him through Death Valley in California,  Great Sand Dunes in Colorado, Green River in Utah, Coos Bay in Oregon, and a quite a few places in between. Mark seems to always be on the hunt for the next big adventure, but someone never ends up on any.  His time on the road is spent speculating life,  the outdoor lifestyle/adventure life. His naivetรฉ about life and adventures is quite possibly the best part of the book. It gives him the perfect voice to look past and even contradict the ever growing marketing driven “van life” to show us that authenticity no matter what you are doing is the quickest path to happiness. Find out if you can keep up with his almost adventures!        Five Million Steps Author: Lon Chenowith Join Lon Chenowith on a hike that spans 2200 miles and passes through 14 states. Lon takes us with him as he hikes the Appalachian Trail. It all started with a dream in his teens he sets off on a training hike with his two young sons. He quickly realizes that his adventure is going to be a long and ambitions journey that he will undertake alone. Lon’s love for the outdoors and the romance of hiking the entire trail is challenged, but he overcomes this with his faith in his family and in God. Known as the Arkansas Traveler Lon Section-Hikes the entire trail that culminates with a fourteen year love and hate relationship with the trail. Walk all five millions steps along side of Lon and his crazy adventure.     What are your favorite reads that involve adventure and the outdoors? I would love to hear your recommendations as I am always on the lookout for new things to check out. Happy adventures! [...] Read more...
April 3, 2024Learn more at http://blog.rei.com/paulsboots/ If you have not heard about the story of Paul’s boots by now it is a story that will leave you touched and fall in love with the backpacking community all over again. โ€œRecently, a heartbroken woman contacted the Dirtbag Diaries with a story about a man who waited just a little bit too long to chase a dream. Paul remained indefinitely stuck in the quicksand of responsibility. Entwined in rat race of obligations, he put off his aspirations to care for struggling loved ones. When tragedy struck, Paulโ€™s life was snuffed out too soon, leaving his dream of thru-hiking the Appalachian Trail incomplete. Crushed by Paulโ€™s unfinished ending, his wife contemplated ways she could bring his story to a close. Mโ€™Lynn, had one last request for her beloved husband. She wanted to see Paulโ€™s boots, dirt-caked and heavy on the Appalachian Trail.โ€ The crew at Duct Tape Then Beer (the parent company of Dirtbag Diaries), in conjunction with REI.com, sought out a crew of hikers to help make Paul’s dream of hiking the Appalachian Trail a reality. โ€œThink of this as a non-linear Olympic torch relay. We had three sets of boots and, throughout the summer, they were all on the trail at different points. Together, the boots and those that carried them covered the length of the Appalachian Trail. 2,189 miles.โ€ Explains the Duck Tape then Beer crew in the beginning narration of the short film. Released on October 9th, 2016 this film will have you grabbing for the closest tissues and put warmth in your soul. [...] Read more...
April 2, 2024If you are like me you are always looking for something new to curb your wanderlust. Here is a list of adventure and outdoor documentaries that you can stream online. 180ยฐ South Follow Jeff Johnson as he retraces the epic 1968 journey of his heroes Yvon Chouinard and Doug Tompkins to Patagonia. His adventure quickly turns when he becomes shipwrecked off Easter Island. While on Easter Island he surfs the longest wave of his life and prepares himself for a rare ascent of Cerro Corcovado. The adventurerโ€™s spirits are lifted when he meets up in a rainy hut with Chouinard and Tompkins. Learn More!   Long Way Round This documentary series follows actors Ewan McGregor and Charley Boorman on a motorcycle trip around the world. The two adventurers travel through such places as Kazakhstan, Siberia, Mongolia, Alaska, and the continental United States before ending the journey in New York. The journey is filmed by a mix of first person cameras and a cameraman whoโ€™s adventure is just as trying as McGregor and Boorman. Learn More!   Long Way Down In a follow-up to the documentary series โ€œLong Way Roundโ€, actors and friends Ewan McGregor and Charlie Boorman travel from John Oโ€™Groats, Scotland to Cape Town, South Africa on an epic motorcycle adventure. They travel down through Europe and Africa, getting an unique view of the local cultures. Learn More!   K2: Siren of the Himalayas K2: SIREN OF THE HIMALAYAS follows world-class alpinists Fabrizio Zangrilli and Gerlinde Kaltenbrunner who are accompanied by veteran climbers Jake Meyer and Chris Szymiec in a breathtaking high-altitude mountaineering adventure. Director Dave Ohlson joins this groupโ€™s epic K2 journey on the 100-year anniversary of the Duke of Abruzziโ€™s landmark expedition in 1909. The documentary also takes a look at the history and geography of the Karakoram mountains while contemplating the risks, rewards and personal nature of exploration in an age when there are few places left to explore. Learn More!   Where the Trail Ends Where the Trail Ends is a film following the worlds top freeride mountain bikers as they scout the globe for new trails which changes big mountain free riding forever. The story documents one manโ€™s challenge of mother nature and himself showcasing cast of colorful and adventitious characters. Learn More!   Mileโ€ฆ Mile & a Half In the words of The Muir Project Team โ€œIn an epic snow year, five friends leave their daily lives behind to hike Californiaโ€™s historic John Muir Trail, a 211-mile stretch from Yosemite to Mt. Whitney (the highest peak in the contiguous U.S.). Their goal โ€” complete the journey in 25 days while capturing the amazing sights & sounds they encounter along the way. Inspired by their bond, humor, artistry & dedication, the group continues to grow: to include other artists, musicians & adventure seekers. Before they all reach the summit, hikers and viewers alike affirm the old adage โ€” itโ€™s about the journey, not the destination. Mileโ€ฆ Mile & A Half is the feature-length documentary of that journeyโ€ฆโ€ Learn More!   Maidentrip 14-year-old Laura Dekker sets out on a two-year voyage in pursuit of her dream to become the youngest person ever to sail around the world alone. Follow her adventures through all of the ups and downs that living alone on the sea brings. Learn More!   Storm Surfers 3D STORM SURFERS 3D is an epic, character-driven adventure documentary following two best friends on their quest to hunt down and ride the biggest and most dangerous waves in Australia. Aussie tow-surfing legend Ross Clarke-Jones and two-time world champion Tom Carroll enlist the help of surf forecaster Ben Matson and together they track and chase giant storms across the Great Southern Ocean. Learn More!   The Summit The story of the deadliest day on the worldโ€™s most dangerous mountain, when 11 climbers mysteriously perished on K2. Learn More!   DamNation This powerful film odyssey across America explores the sea change in our national attitude from pride in big dams as engineering wonders to the growing awareness that our own future is bound to the life and health of our rivers. Dam removal has moved beyond the fictional Monkey Wrench Gang to go mainstream. Where obsolete dams come down, rivers bound back to life, giving salmon and other wild fish the right of return to primeval spawning grounds, after decades without access. DamNationโ€™s majestic cinematography and unexpected discoveries move through rivers and landscapes altered by dams, but also through a metamorphosis in values, from conquest of the natural world to knowing ourselves as part of nature. Written by DamNation Team Learn More! [...] Read more...
March 29, 2024How many times have you gone out hiking, camping, backpacking, or really any adventure and everything went as planned? If your luck is anything like mine that number is very very low.  As an Eagle Scout my training even as a young Cub Scout has helped me out of some strange and crazy situations over the years. Looking back on my Scouting skills and training I have put together a list of Scout skills that every backpacker should know. 1. Attitude In the outdoors it is very important to stay sharp and keep your wits about you. This can keep you safe but can also help you in emergency situations. Having a proper attitude can be one of the most important pieces of gear you have. Having a proper attitude and staying sharp will help you assess any situation that arises. Staying calm will help you get through any situation, good or bad. 2. Basic First Aid Having the knowledge of basic first aid skills is extremely important. Knowing how to properly bandage and clean small wounds, create splints, and how to properly take care of larger wounds until help can be reached. Knowing these skills will help you and those in your party. Having these skills and knowledge may never be used but having it when you need it is priceless. Many local gear shops provide free basic first aid training and for a fee you can also take Wilderness First Aid and Wilderness First Responder courses to get certifications. Red Cross Basic Wilderness First Aid booklet | Locate courses near you! 3. Fire Starting and Building Knowing how to build, start and maintain a fire is crucial to any survival situation. Knowing the basics can help you in any situation. Also carrying the proper fire starting kit is also handy.  Fire can keep you warm, purify water, and cook food. It is one of the most basic elements of survival.  Also knowing how to build and maintain a fire in different types of environments and weather is a crucial survival skill. Learn Basic Fire building 4. Pioneering Pioneering is the knowledge of knots, ropes, splices, lashing and the ability to build basic structures. Pioneering is one of the oldest of Scouting’s skills. Having the knowledge of pioneering basics during emergency situations can allow you to create solutions to many problems. Having a working knowledge of how to use rope, knots, and basic building skills will allow you to create a shelter, create stretchers, create a make-shift climbing harness and so much more. Knowing these skills can also make for fun camping skills to teach friends and your children. Just make sure you always take rope or cord with you on every adventure. Basic Structure Building |  Basic Lashings | Basic Scout Knots 5.  Orienteering Orienteering is the use of a map and compass to find locations or plan a journey. This skill has been vital for humans for thousands of years. With the most basic skills you can find your way to safety and or back to civilization. Technology is great but it can and will fail you in moments of need. Knowing how to use a compass and map can get you anywhere anytime without the need of batteries and screens. Also knowing how to navigate without having anything can also be very handy. Do you know how to follow the proper stars at night to get you back to safety? Are you safe to follow water down a mountain to get to safety? Learn Basic Map Skills | Learn Compass basics 6. Self Protection You will most likely not need to be trained in martial arts but it is helpful to know some of the basics of self protection in the outdoors. Knowing how to scare away animals by making yourself very loud and look bigger than you really are is the primary way of making sure the animals know you are there and that you are something they do not want to mess with. Depending on the area you might need to carry extra gear like bear spray with you. 7. How to Find Food and Water Learning how to forage for food and find clean water is a skill everyone who spends time in the outdoors should know. Knowing what plants are in the area and which ones are edible is extremely important. Just because it is delicious looking berry does not mean it is safe to eat. Having a local knowledge of the flora and fauna is easily obtained by books and internet searches. Also being able to locate water sources that can be used to cook, drink, and clean yourself. If you end up stranded on a beach can you drink the sea water? Learn more about Finding Food and Water 8. Filter or Treat Water Many backpackers will take some type of water filter or water treatment with them but not all the time. Knowing what types of water sources can be potentially clean or dirty is very important. If you are hiking in the United States many of the water sources are contaminated with a little parasite called Giardia. Many of the springs however are safe from Giardia and other parasites but do you do know the difference between a spring and a stream? โ€จโ€จCollecting clean water can require a large amount of effort. Boiling water is the most effective however it takes the most energy and effort to complete unless you are able to make a fire and happen to have something to boil the water in then you are set. You can also collect rain water as it is raining or create a solar water distiller. Water Collection Techniques There are many more survival skills that can help you in any situation, but we felt these to be the most basic and important. What Scouting survival skills would you add to this list? [...] Read more...
March 27, 2024Trekking poles can be a huge help while hiking. They can help you keep your balance and help keep your muscles and joints from the wear and tear of hiking.  I personally find them to be very useful and use them on day hikes as well as week-long backpacking trips.  Most of my backpacking gear is purchased because it can be used for several uses which help keep pack weight down by requiring fewer items in my kit. โ€จโ€จWhen I talk about products being multi-purpose you might be asking how can trekking poles be used in other ways than just being a โ€œwalking stickโ€. I have created a list of ten ways you can use your trekking poles for more than just walking. 1. Shelter If you have a raincoat (poncho) or a tarp you could build a shelter using your trekking poles as part of the structure to keep you out of the elements.  It does not take much to create a very basic lean-to shelter to get out of the elements. It might not be pretty looking and might not be the best-constructed building but even the slightest barrier helps. โ€จโ€จThere are also many tarp shelters or even tents on the market today that require the use of trekking poles to set up. 2. Depth or Stability Gauge No matter the season there are times when you might need to gauge the depth of something.  You can use your trekking pole(s) to gauge how deep water is to make sure that the water could be safely navigated through and to keep your boots dry when crossing. You can check to see how deep the snow or muck is when crossing an area that you do not feel comfortable with the crossing. Poking and prodding rocks, logs, and other questionable places can help keep you from losing your footing. This could cause you to go crashing to the ground or into a stream.  Using your poles to find the safest path is an easy way to save you time and effort in both calm and stressful times. 3. Animal deterrent One never knows what kind of animals or bugs they might run into on the trail. If you like to get up and hiking early in the morning you might end up using your trekking poles to clear the trail of any unwanted spider webs. They can also be used to raise above your head and waved around as if they are an extension of your arms. This is to scare away bears and other predatory animals such as dogs and mountain lions as long as you are not swinging it directly at them or trying to fight them off as if your trekking poles are swords. 4. Laundry Clean clothes can be a luxury on many an extended backpacking trip but maybe a luxury that is easier to accomplish with the help of your trekking pole(s). You can wrap your wet clothing around the trekking pole pulling it as tight as you can wringing out the water to help dry your clothing faster.  You can also use your trekking poles to construct a clothesline when there are no trees to use.  The possibilities are endless on how you can use them for laundry and your creativity is your limit. 5. Splints In the event of an emergency, you can create a splint to help set your own or someone elseโ€™s leg or arm to prevent further injury. With simple materials such as your trekking poles, shoelaces, belts, rope, and nylon backpack straps you can create a splint to help create mobility for an injury and help keep someone from getting injured even further.  We are not going to teach you how to do this as it is advised to take a wilderness first aid or first aid course to learn the proper splinting methods. 6. Communication Trekking poles can be used to help create signals to communicate or to help during an emergency. Many hikers choose to hike at different paces than their trail partners and leaving a trekking pole as a pointer to be picked up can help show where you are camping for the night. You can also use a trekking pole like a giant pencil to write a note into the dirt or mud when needed. Holding your trekking above your head in the shape of an X can tell someone to stop or do not come this way. It can also signal come help immediately.  If you are hiking with a group or a partner make sure to discuss with them the meanings of your pole usage to ensure everyone uses the same messages. 7. Help carry gear If you are in need to carry some extra gear or someone is unable to carry their own gear it can be very helpful to build either a sled or a platform for multiple people to carry gear. Using your scouting and survival knowledge of knots and lashings to build a sled or platform can be very quick and easy to make. While one trekking pole will not be able to carry a very heavy load on its own however several working together will hold a surprising amount of weight. 8. Create a stretcher Very similar to creating a gear carrier you can use a sleeping bag and your trekking poles to create a stretcher in the event of an emergency where you will need to carry someone to an extraction point or to safety.  To learn the proper way to create a stretcher visit your local library to find a Scout Handbook or a wilderness survival book for proper instructions. 9. Fishing pole Many of the emergency kits we carry have a fishing line and a fishing hook. Have you ever thought about using those items in a non-emergency situation? Finding yourself next to an alpine lake and wanting to fish but did not bring all the proper gear can be solved by using your emergency kit fishing gear and your trekking pole. It is not the fanciest of setups but it might land you a nice dinner. This tactic can also be used in emergency situations. (If you plan on fishing make sure you have the proper permits.) 10. Selfie Stick Sometimes your arms are just not long enough. Using your trekking pole as a selfie stick can be an easy lightweight way to document your adventures.  Many first-person action cameras such as the GoPro brand come with mounts that can be easily adapted to work with trekking poles. For those of you with standard cameras could use something like the StickPic. A SticPic is a handy lightweight device that allows you to mount a camera on the end of your trekking pole quickly and easily. They work great or smaller cameras with the standard tripod mount and many different types of trekking poles. How else have you had to use your trekking poles in normal everyday situations or emergency situations? [...] Read more...
January 29, 2024Ready to dive into your next outdoor escapade? Whether you’re a seasoned camper or a budding overlander, one critical aspect that can make or break your experience is water storage. Proper hydration is key to a safe and enjoyable journey. Letโ€™s dive deeper into the essentials of water storage for your outdoor adventures. Why Water Storage is Crucial When venturing into the wilderness, access to clean water isnโ€™t always guaranteed. Dehydration can quickly turn an exciting adventure into a risky endeavor. Thatโ€™s where effective water storage comes into play. Itโ€™s not just about quenching your thirst; it’s about being prepared for any situation. Choosing the Right Containers Selecting the right container for water storage is vital. You need something durable, reliable, and safe. The Dometic Go 11L  is an excellent choice. These containers are BPA-free and made from food-grade material, ensuring your water stays clean and taste-free. Plus, they offer several different accessories  and are perfect whether you’re on a solo trip or with a group. Capacity Planning: How Much Water Do You Need? A common question among outdoor enthusiasts is, โ€œHow much water should I carry?โ€ The answer varies based on the duration of your trip, the climate, and your activity level. As a general guideline, plan for at least one gallon per person per day. This amount should cover drinking, cooking, and basic hygiene needs. For a group trip, consider a larger solution like the Coleman 5-Gallon Water Carrier. Its sturdy design and easy-to-use spigot make it a favorite among outdoor groups.Maintaining Water Quality Storing your water properly is as important as the amount you carry. Keep your water containers in a cool, shaded area to prevent algae growth and maintain freshness. Also make sure to clean your water tanks regularly.  Emergency Supplies: Always Be Prepared Even with the best planning, unexpected situations can arise. Thatโ€™s why having a backup plan is crucial. Water purification tablets, like Potable Aqua Water Purification Tablets, are lightweight, easy to pack, and effective in making natural water sources safe to drink. For more advanced purification, the Sawyer Mini Water Filter is a game-changer. It filters out bacteria, parasites, and microplastics, making it ideal for drinking directly from streams or lakes. Innovative Solutions for Water Storage Advancements in outdoor gear have introduced innovative solutions for water storage. Collapsible water containers are a space-saving option, expanding when filled and folding down when empty. Similarly, hydration bladders are an excellent choice for hikers and bikers, allowing easy access to water without stopping your journey. Conclusion: Hydration is Key Water storage is more than a convenience; it’s a necessity for any outdoor adventure. By choosing the right containers, planning your capacity, maintaining water quality, and preparing for emergencies, you ensure a safe and enjoyable experience. Remember, staying hydrated is crucial for exploring the great outdoors. Prepare well, stay hydrated, and embrace the adventure! Looking for more camping and overlanding tips? Check out our latest articles and gear recommendations. Stay adventurous and hydrated! [...] Read more...
January 19, 2024Welcome to another journey with us at Wander the Road! As the mercury dips and snow blankets the landscape, it’s not just about cozy fires and hot cocoa; it’s also crucial to ensure your vehicle is winter-ready. Let’s dive into the essentials of winter vehicle maintenance to keep your adventures safe and uninterrupted, even in the harshest of winters. 1. Battery Check: Powering Through the Cold Cold weather can be tough on your vehicle’s battery. The last thing you want is to be stranded with a dead battery in sub-zero temperatures. Ensure your battery is in top condition; consider a professional check-up to assess its health. A battery that’s more than three years old might need replacement. For more info, check out AAA’s guidelines on battery care. 2. Tire Talk: Grip and Safety Winter tires are not just an accessory but a necessity in snowy and icy conditions. They provide better traction and can significantly reduce braking distances. Regularly check your tire pressure too, as it can decrease in colder temperatures. Learn more about winter tires at Tire Rack’s Winter Tire Guide. 3. Fluids: Your Carโ€™s Lifeblood Your vehicleโ€™s fluids play vital roles, especially in winter. Use a winter-grade oil that flows better in cold conditions. Ensure your antifreeze levels are sufficient, and the windshield washer fluid is suitable for freezing temperatures. For more detailed guidance, visit CarCare.org. 4. Wipers and Lights: Clear Vision, Safe Drive Replace wiper blades if they’re worn out to ensure clear visibility during snowfall or sleet. Also, check that all lights are working correctly to improve visibility and safety. For tips on choosing the right wipers and bulbs, AutoZone has great resources. 5. Emergency Kit: Better Safe than Sorry Equip your vehicle with an emergency kit. Include items like a blanket, extra warm clothes, a flashlight, a shovel, and snacks. Itโ€™s always better to be prepared for any situation. The Red Cross offers excellent advice on what to include in your car’s emergency kit. 6. Regular Check-Ups: Prevention is Key Schedule regular check-ups with your mechanic to ensure everything is in working order. Winter can exacerbate existing problems, so itโ€™s better to catch issues early. Winter brings its own set of challenges, but with the right preparation, you can ensure your vehicle is as ready for adventure as you are. Remember, safety is paramount in these frosty months. Keep these tips in mind, and you’ll be set for a winter of safe and enjoyable road trips! Happy winter travels from all of us at Wander the Road! Remember, this blog offers general advice โ€“ always consult a professional for specific concerns regarding your vehicle. Safe travels and happy winter adventures! For more tips and tales from the road, keep exploring with us at Wander the Road. [...] Read more...
January 17, 2024Meta Description: Uncover the secrets to a cozy night’s sleep while camping with our guide on choosing the right sleeping bag. Learn about down vs. synthetic options, especially when wet, and find trusted resources for your next adventure. Understanding Sleeping Bag Insulation: Down vs. Synthetic 1. Down Sleeping Bags: Down, often hailed as the gold standard for insulation, is known for its incredible warmth-to-weight ratio. It’s like being enveloped in a warm cloud. However, down has a significant Achilles’ heel โ€“ its performance when wet. Once down feathers get wet, they clump together, losing their loft and, consequently, their insulating properties. This can be a serious concern in damp environments or if you’re expecting rainy weather. For premium down sleeping bags, check out REI’s Down Sleeping Bag Collection. 2. Synthetic Sleeping Bags: Enter synthetic insulation. These sleeping bags are often made from polyester fibers designed to mimic down’s loftiness while overcoming its weakness. Synthetic materials retain their insulating abilities even when wet, making them a reliable choice for damp conditions or for those who prefer not to use animal products. They might be slightly heavier and less compressible than down, but they’re generally more budget-friendly and easier to care for. Find a variety of synthetic sleeping bags at Backcountry’s Synthetic Collection. Tips for Staying Warm in Your Sleeping Bag Layer Up: Just like during the day, layering is key. Wear a base layer of moisture-wicking fabric to bed. Use a Sleeping Bag Liner: This can add extra warmth and keep your bag cleaner. Cap Your Head and Feet: Wear a beanie and warm socks. A lot of heat is lost through the head and feet. Stay Dry: Make sure you get into your sleeping bag dry. Wet clothing will sap your body heat. Eat a Snack: Having a snack before bed can help your body generate heat. For more tips, visit Camping and Hiking Tips at Wander The Road. Additional Resources for the Perfect Night’s Sleep The Ultimate Guide to Camping Sleep Systems How to Choose a Sleeping Bag – Outdoor Gear Lab Staying warm at night while camping is about more than just comfort; it’s about safety and enjoying the wilderness to its fullest. With the right sleeping bag โ€“ be it down or synthetic โ€“ and a few smart strategies, you can ensure that your nights under the stars are as cozy as they are memorable. [...] Read more...
January 15, 2024Embracing the great outdoors during winter can be an exhilarating experience, but it also poses unique challenges, especially when it comes to staying warm. Whether you’re setting up a campsite amidst snow-clad trees or hiking through frosty trails, the right clothing strategy is crucial for your comfort and safety. This blog post delves into the art of layering and the best materials for winter camping and hiking apparel. 1. The Art of Layering: Layering is your first line of defense against the cold. It allows you to adjust your clothing based on your activity level and the weather. Base Layer: The base layer sits closest to your skin and its primary function is moisture management. Opt for materials like Merino wool, which is excellent at regulating body temperature and wicking away sweat. Check out Merino Wool Base Layers for high-quality options. Middle Layer: This layer is all about insulation. It traps the heat your body produces. Fleece or lightweight down jackets are perfect for this. Consider Down Fill Jackets for maximum warmth without the bulk. Outer Layer: The outermost layer protects you from wind, rain, or snow. Look for waterproof and breathable materials. A good choice is a shell jacket with Synthetic fill, offering both insulation and protection. Explore a look at top rated Synthetic Fill Outer Layers 2. Choosing the Right Materials: The materials of your clothing play a vital role in keeping you warm. Merino Wool: Not only is it great for base layers, but Merino wool socks also keep your feet warm and dry. It’s soft, non-itchy, and naturally odor-resistant. See recommended products at Merino Wool Gear. Down Fill: Down is a lightweight and efficient insulator, ideal for mid-layers. Itโ€™s perfect for dry, cold conditions. However, if it gets wet, its insulating properties decrease. Synthetic Fill: Synthetic insulation is quick-drying and insulates even when wet, making it a reliable choice for damp conditions. Check out Synthetic Insulated Gear for durable options. 3. Don’t Forget Your Extremities: Your head, hands, and feet need extra attention. Insulated gloves, woolen socks, and a warm hat are indispensable. For high-quality winter hats and gloves, visit (#). 4. Layering for Different Activities: Adjust your layers based on your activity. Remove a layer when you’re hiking uphill to avoid sweating, and add a layer when resting or in lower temperatures. 5. Additional Resources: For more detailed information on winter camping and hiking clothing, visit: Sierra Club’s Winter camping guide REIโ€™s Expert Advice on Layering Staying warm while camping and hiking in winter is all about the right clothing choices. By mastering the art of layering and selecting appropriate materials like Merino wool, down fill, and synthetic fill, you can enjoy your winter adventures comfortably and safely. Remember, each layer serves a purpose โ€“ moisture-wicking, insulation, and protection from the elements. Tailor your layers to your activity level and the weather conditions, and you’ll be all set for a wonderful winter outdoor experience. Stay warm and explore on! [...] Read more...
January 6, 2024Iowa’s newest state park, Blackburn State Park, lies 3 miles northeast of Thurman. William R. (Bill) and Sara Blackburn generously donated a large parcel of land in 2019, resulting in the establishment of this 72-acre park. Bill, who has roots in the area, traces his family history back to 1840 when his ancestors settled in the Loess Hills area. Iowa’s Loess Hills The Iowa Loess Hills boast a unique geological history dating back thousands of years. The last Ice Age witnessed the formation of this distinct landscape, as glacial winds carried fine silt and sediment to settle in the region. Over time, these wind-blown deposits shaped the steep, rolling hills that now span approximately 200 miles along the western edge of Iowa, creating a breathtaking and distinctive terrain. These hills not only paint a picturesque backdrop to the landscape but also offer valuable insights into the environmental changes of the past. The dynamic processes of the Earth find a living testament in the Loess Hills, making them a captivating destination for nature enthusiasts, hikers, and those intrigued by the intricate tapestry of Iowa’s geological history. Today, ongoing efforts to preserve and appreciate the ecological significance of the Loess Hills contribute to establishing them as a cherished natural treasure in the heartland of America. In the Midwest, Iowa often earns the label of a “flyover state,” yet it distinguishes itself. Although it commonly gets acknowledged for its endless cornfields and Des Moines, the state presents a diverse range of offerings, encompassing its rich history and geographical marvels across its expanse. Numerous hidden gems beckon exploration in this area. My Connection to Blackburn Sate Park Blackburn State Park holds a special place in my heart, as my family hails from this area, and I have close connections with those who generously donated the land. During my time in Iowa in high school, I forged friendships with Cory, his brother Cameron, and their parents. We spent countless hours together in their basement, creating memories and sharing laughter. Although many years have passed since those days, a tragic event in 2003 marked the loss of Cameron in a freak tractor accident while working with his grandpa. To honor Cam’s memory, I find solace in reflecting on those cherished moments at the stone bench. As you sit in the profound silence unique to such places, gazing over the beautiful hills, it’s impossible not to develop a deep affection for this location. A devoted family, passionate about the area, constructed this phenomenal park, making it imperative for us to treasure it as much as they do. For further details about the park and additional photos from my visit, explore my Blackburn State Park page. If you find yourself in Southwest Iowa, make sure to visit this place โ€“ you won’t be disappointed. [...] Read more...
July 10, 2023I am sure you have either seen an overlanding rig by now, either in the wild or on some social media post. They have a rooftop tent and a ton of gear strapped to the outside of the vehicle.  While they look cool, you must ask yourself what happens if an unseen force suddenly stops that vehicle and what happens to all that gear. I try to keep as much gear inside the vehicle as possible and keep things as hidden / stealthy as possible. Since my rig is also my daily driver, I do not want to give people a reason to explore the goodies inside.  Tips on how to do that will come in a future post. We are talking about Roof Rails today and why you need to know what you have before strapping hundreds of pounds of gear to them and the related safety issues.  On my Jeep, I had an external exoskeleton that allowed me to attach gear and my rooftop tent to the vehicle. I also made sure to understand the max load-out weight limits of the vehicle as well. The Jeep was unique because I had a soft top on it at first and did not want to modify it in a way that would hinder my ability to use it. Many who own a Jeep with a hard top will permanently mount a roof rack to the hard top to allow for gear storage.  Moving over to the 4Runner, I researched if the factory roof rails would allow me to add the tent. What I found was quite interesting.  I found that the manufacturers will provide suggested weight limits but would not give exacts. I also learned there are two types of weight limits static and dynamic.  Static Weight Limit  The static weight limit is the maximum weight the roof rails or rack can hold while a vehicle stands still.  Dynamic Weight Limit  Dynamic weight limit is the maximum weight the roof rails or rack can hold while the vehicle is in motion. This limit is much lower than the static weight limit due to the increased forces acting on the vehicle when in motion.   NOTE: Each vehicle is different, and every product from the manufacturer or aftermarket has different limits. Review the owner’s manuals and documentation for those limits before loading up your vehicle or making purchases based on your needs.  What I found for my 4runner was that the tent I had on my Jeep was slightly over the limit of the rails, and there are cross bars that you can purchase that are heavier than the factory ones. These cross bars would have been a perfect solution if I was going to add a roof basket and store cargo up there when traveling. However, with my intentions of putting a rooftop tent up there, I wanted a little extra security and peace of mind by having my options over-engineered vs. “it could work.” During that same time, a news article was spreading around the internet that an improperly strapped-down kayak had flown off a vehicle on the highway and struck a motorcyclist. A tragic accident could have been avoided, and considerable conversations continue about what is safe and why you need all that gear strapped to your vehicle. With that in mind, I set out to see my options. Early in the research, it became clear that I would have to replace my roof rails with a rack. Thankfully there is a plethora of options for after-market racks for the 4runner.  Based on my needs, budget, overall reviews, etc, I picked a Prisu rack. More specifically, I chose the no-drill rack option as I did not want to drill into the truck body.  For anyone looking to upgrade your rails with a roof rack, I would suggest figuring out what you would be using it for if you do not plan on hauling lots of weight, then maybe add a more robust cross-bar system to haul your kayaks back and forth to your favorite spots. The flip side is if you plan on putting something much heavier on your vehicle, then do the research, read reviews, and it does not hurt to go with a little extra, just in case.  Since installing the rack, I have added my tent, and sadly the tent covers the entire rack and did not allow for much room when installing it. It was a process, and I finally got it all bolted down. I learned quite a bit during the process. Even when installing simple things, make sure to have extra long wrenches to get into the spaces you can’t easily access. In a future post, we will look at different types of tents and what might make the most sense for you.  As always my friends happy trails and stay adventerious.  Get stories and posts before they are posted here on the site by signing up for the email newsletter. Follow me on Instagram and Facebook. You can also find fun stickers and more from the places we all love at my Etsy shop.   [...] Read more...
July 7, 2023The weekend is coming, and we’re preparing for a trip. Time to load up the adventure mobile and hit the road. Car camping is fun, and having ample gear space is convenient. But do you know your vehicle’s weight limit? Most people won’t come close to that weight, but what about when you load up the family, dogs, and gear? And what about all the gear on the roof rack? Is it safe if you’ve added tents, racks, and accessories? I’m not an expert on the subject, but I’ve spoken to professionals and researched specifically for my vehicle. Consult a professional if you have safety concerns or questions about your vehicle. How to Determine Your Vehicle’s Payload 1. Check Your Vehicle’s Manual The first step in determining your vehicle’s payload capacity is to refer to the owner’s manual. Manufacturers provide detailed information about the maximum allowable payload in this essential document. Look for the “Gross Vehicle Weight Rating” (GVWR) or “Maximum Loaded Vehicle Weight” section. The GVWR is the total weight limit, including the vehicle, passengers, cargo, and any additional equipment. The manual will specify the payload capacity and any other relevant guidelines. 2. Calculate the Curb Weight You need to know your vehicle’s curb weight to determine the available payload. The curb weight represents the vehicle’s total weight without any passengers or cargo. You can find this information in the owner’s manual or by checking the manufacturer’s website. Remember that curb weight may vary depending on optional features or trim levels. Subtract the curb weight from the GVWR to obtain the payload capacity. 3. Account for Passengers Next, consider the weight of the passengers who will be traveling in your vehicle. Take into account the number of occupants and their approximate weight. It’s essential to factor in not only the driver but also any passengers who will be joining you on your journey. Add the total passenger weight to the payload capacity calculated in the previous step. 4. Include Luggage and Cargo Now it’s time to estimate the weight of your luggage and any additional cargo you plan to carry. Consider the items you’ll transport, such as suitcases, camping gear, or tools. Remember that payload capacity includes both the weight inside the vehicle and any load on roof racks or towing attachments. Ensure that the combined weight of passengers, luggage, and cargo does not exceed the calculated payload capacity. 5. Be Mindful of Towing or Trailer Weight If you plan to tow a trailer or attach any additional equipment, it’s crucial to account for their weight. Refer to your vehicle’s manual for the maximum towing capacity and subtract this weight from the remaining payload capacity. Overloading the vehicle or exceeding its towing capacity can decrease stability and control, compromising safety. 6. Consult a Professional if Needed If you have specific concerns or questions about determining your vehicle’s payload capacity, it’s always advisable to consult a qualified mechanic or contact the manufacturer’s customer service. They can provide accurate and personalized guidance based on your vehicle’s specifications, ensuring you stay within the recommended limits. Conclusion Determining your vehicle’s payload capacity is essential for safe and efficient travel. Following the steps outlined in this guide, you can accurately determine your vehicle’s maximum weight. Remember to prioritize safety and adhere to the manufacturer’s guidelines to avoid overloading your vehicle. Understanding your vehicle’s payload ensures a smooth and worry-free journey. Safe travels! Additional Tips If you are unsure how to determine your vehicle’s payload capacity, you can consult a qualified mechanic or contact the manufacturer’s customer service. It is important to note that a vehicle’s payload capacity can vary depending on the specific model and year. If you plan to tow a trailer or attach any additional equipment, it is important to factor in the weight of the trailer or equipment when calculating the payload capacity. Overloading your vehicle can be dangerous and lead to decreased stability and control. It is important to always stay within the recommended payload capacity. I hope this guide has been helpful. If you have any other questions, please feel free to ask. Get stories and posts before they are posted here on the site by signing up for the email newsletter. Follow me on Instagram and Facebook. You can also find fun stickers and more from the places we all love at my Etsy shop.   [...] Read more...
June 19, 2023It is Wednesday again, and it is that time when I share another place I have enjoyed along my travels with you. While this โ€œlocationโ€ is more of an area than a physical spot, it is well-known by those who spend time in or live in Arizona. The Mogollon Rim is located just outside Payson, Arizona shares dramatic views that rival the Grand Canyon. This naturally formed geographic feature spams 200 miles from Yavapai County, Arizona, into New Mexico. The central section of the rim is described as having highly eroded cliffs of limestone and sandstone that have been dramatically cut through the centuries. With most common elevations between 4,000 and 5,000 feet on average, some areas rise well over 8,000 feet. Dramatic views with sheer dropoffs to the valleys below are incredibly stunning. Camping along the rim. There are many great spots to camp along the rim. While many of the campsites are dispersed with an established fire ring and visible tenting areas, they do not have any maintained amenities. At these sites, you must bring everything you need, including water, and follow Leave No Trace principles for all trash, human, and dog waste disposal. The dispersed campsites are all located on national forest land, and you must have proper permits and passes while recreating in national forest lands.   There are also several maintained campgrounds in the area for those who prefer a little less rustic experience. The Mogollon Campground, Woods Canyon Lake, Aspen Campground, and Chevelon Canyon Lake Campground are all close, but they fill up fast, so reserve your campsites early. Many of the lakes also have cabin options in the area as well. I enjoyed the weekend we camped here. The desert floor in Pheonix and Tucson had warmed up, and heading into the mountains gave our group a nice cool respite from the heat. While the road was fairly close to the camp, there was not too much evening traffic. During the day, however, there was a lot of traffic, including 4-wheelers, side-by-sides, and 4×4 vehicles driving around. This area is beautiful and definitely worth exploring and camping. The weather was beautiful, even with a quick afternoon rain shower that dumped on us and then moved off as quickly as it had arrived. There are also several towns close to the Mogollon Rim that could serve as great basecamp options. Those towns include Payson, Pine-Strawberry, Heber-Overgaard, and Pinetop-Lakeside. I highly recommend the Strawberry Inn in Strawberry and THAT Brewery and Pub in Pine. Things To Do This part of Arizona is an outdoor loversโ€™ paradise. Enjoy an afternoon picnic, hiking, horseback riding, rock climbing, hunting, fishing, boating, and more. With over 10 lakes brimming with fish, the area is perfect for anglers and paddlers to enjoy ample time on the water. We spent our weekend exploring the area and kayaking at the C.C. Cragin (Blue Ridge) Reservoir. The parking at the reservoir is limited and fills up quickly. I would also suggest exploring all of the small towns in the area. They each have a unique charm and have just as unique places to shop, dine, and experience. There are also quite a few natural areas, such as the Tonto Natural Bridge and Fossil Creek, to name a few. The Rim Lake Vista Trail, Kinder Crossing Trail, and two Arizona National Scenic Trail sections, passages 26 and 27, are accessible in the area. Many of them are shared-use trails, so make sure to be hiker, mountain biker, or equine aware and Know Before You Go Reserve your campsite at established camps well before your desired arrival dates. Researched dispersed camping before arrival. It might take some hunting to find a good place as all rim campsites fill up quickly, and all campsites are well-known in the area. Plan for weather, fires, and bugs. Check the Forest Serviceโ€™s websites for weather alerts, fire warnings, and closures. (Coconino and Apache-Sitgreaves National Forests) Take extra water with you! Leave No Trace and have fun! Have you camped at Mogollon Rim? I would love to hear about your experiences and favorite places to visit there. As always, my friends, happy trails, and stay adventurous. Get stories and posts before they are posted here on the site by signing up for the email newsletter. Follow me on Instagram and Facebook. You can also find fun stickers and more from the places we all love at my Etsy shop.   [...] Read more...
June 12, 2023Whether you’re going on a short weekend trip or an extended adventure, packing the right items is essential for a smooth and enjoyable journey. Forgetting essentials can cause stress and inconvenience. To prevent such mishaps, we’ve compiled a list of ten must-have items for travel. Let’s get started! I am sure you will say I already know the ten items you will have on this list.  There are many articles about there about his same topic. However, this one is going to be a bit different. We will not be talking about: Passport and Travel Documents Medications and Prescriptions Charging Cables and Universal Travel Adapters Travel Insurance  Toiletries  Instead, my list includes 10 items I have either left behind or needed when traveling. No matter the destination, international trip, or weekend camping trip, I never leave home without these items.  1. Cash and an additional form of payment from your bank card. There has been a time or two when the gas stations only took cash or their card systems were down. I always make sure to have cash on hand, just in case. I have also had instances where my bank locked my bank card despite telling them I was traveling, and had that been my only form of payment, I would have been stuck until their call center opened the next morning. When I travel, I carry my bank card, cash, and then an emergency credit card that I only use for emergencies and nothing else.  2. Water. During my time in the southwest, it became a habit to always have water on hand as a precautionary measure. When people advise carrying water, they usually refer to drinking purposes. Personally, I believe it’s crucial to carry extra water not only for drinking but also for unforeseen emergencies. You never know when it might come in handy for your vehicle, in first aid situations, or assisting someone needing water for their emergency. Additionally, if you are traveling with pets, as I do, I will always keep additional water just for them.  3. Toilet paper, paper towels, and cloth towels. Accidents happen, and sometimes your digestion doesn’t agree with your food or drink. Leaving a cap off your drink can lead to spills in your cup holders. That’s why I always carry paper towels, disinfecting wipes, and cloth towels for quick cleanups. When traveling with a dog, muddy feet and accidents may require more than a simple wipe-off. Also, it’s wise to have toilet paper on hand as some campsites or restrooms may not provide it. Keep a stash in your pocket or vehicle for easy access. 4. An emergency set of clothes. When flying, you never know when you might end up with all of your luggage sent to another location. A friend recently told me about his family’s luggage disaster with a “discount” airline. When they arrived at their destination, their luggage ended up in another city, and they were told they might get it within a week, but they were only going to be at their destination for a short weekend trip.  I always pack extra clothes and the basics in my carry-on to avoid situations like this because you never know when you and your luggage might be thousands of miles apart. Even on trips where I am driving, I always keep a spare set of clothes hidden away if my vehicle is ever broken into and my suitcase or bags are stolen.  5. Snacks and food.   Having snacks while traveling is important for happiness and convenience. However, you never know when you might end up without food options at your destination due to unforeseen circumstances. Even during holidays when fewer people travel, you may find limited places to eat, especially if you’re driving and only gas stations accept card payments. To ensure you have sustenance, carry snacks and additional food to get you through until you can find a grocery store or a proper meal. The amount of food you can bring depends on your mode of travel. In my case, I have a fridge in my truck for full meals. If flying, I grab snacks from the airport and a portable meal to sustain me during travel. It’s also helpful to know the operating hours of concessions to avoid being stuck with only vending machines. Always be mindful of the time and holidays, and pack food for situations when access to food might be limited.   Making sure you are packing these things on your adventures, you know where they are, and having them accessible will help make your travels more enjoyable, especially when things turn into situations you had not planned for. As they say, adventures never go as planned, but if you can plan for that, you can at least mitigate the lack of fun during those misadventures. As always, my friends, happy trails, and stay adventurous!    [...] Read more...
June 4, 2023During the late 1950s, the commissioning of a spy satellite program marked a significant milestone. The program commissioned the launch of Corona spy satellites from Vandenberg Air Force Base in 1960. These satellites orbited the Earth, capturing over 850,000 images from 1960 to 1972. Their primary objective was to monitor potential military threats worldwide, with a particular focus on the USSR during the Cold War. The CIA constantly updated the surveillance targets based on gathered intelligence. The satellites followed a polar orbit and encountered numerous challenges and setbacks throughout the program. To retrieve the exposed film, they utilized parachutes to drop it back to Earth. However, the most remarkable aspect of this story is not the engineering feats involved in building, launching, and film retrieval but rather the existence of the Corona Targets. The Corona Targets consist of 272 concrete crosses with survey markers at their centers, arranged in a 16×16 grid near Casa Grande, Arizona. Although we acknowledge the presence of trap doors on the east side of each target, their purpose remains uncertain. While farmers have destroyed or obscured some targets, many remain accessible and relatively easy to visit. The provided map categorizes the targets with different colors: blue for targets in good condition, yellow for damaged ones, and red for missing targets. 1995 President Clinton signed executive order 12951, releasing CORONA, ARGON, and LANYARD imagery to the public. These satellites, launched from Vandenberg Air Force Base in 1960, captured over 850,000 images between 1960 and 1972. They aimed to photograph potential military threats worldwide during the Cold War, focusing on the USSR. The targets of surveillance changed based on intelligence gathered by the government. The satellites followed a polar orbit, swiftly capturing images circling the planet. To retrieve the film, it was jettisoned from the satellites in canisters equipped with parachutes, which were then intercepted and brought back to the base by military aircraft. While the engineering involved in constructing, launching, and retrieving exposed negatives is impressive, the true fascination lies in the Corona Targets. These targets, identifiable as concrete crosses with survey markers, hold the most compelling part of the story. Many of these markers can still be found and explored using Google Maps. Numerous accessible targets allow curious individuals to stop by and take a closer look. However, conducting thorough research and adhering to any posted signs before visiting these areas is essential. Discovering the targets sparked curiosity and conversations about their historical significance and impressive engineering. These objects hold a fascinating piece of American history, often overlooked by passersby. Photos by @rscottjones. Follow his Instagram account for captivating Southwest shots and epic park adventures. Have you visited any of the targets? As always, happy trails and stay adventurous, my friends.   [...] Read more...
May 29, 2023There are many products out there that promote making camping or being outdoors more enjoyable. I have been caught buying something from social media ads many times, and they may or may not have worked as advertised. In my many years of camping, I have learned that quite a few things seem too good to be true, but they truly do work. I have compiled a list of some of my most commonly used and favorite โ€œhacksโ€ to help your camping and adventure trips be a little more enjoyable without breaking the bank. 1. Bottle and water storage cleaning. Bottles and water bags are always a pain to clean, and you never seem to have a brush or tool to clean them. Quite a few products on the market promote easy cleaning and killing built-up bacteria. These products can be purchased at local big-box outdoor/camping stores. These products work and will clean your bottles and water bags. However, head to your local pharmacy aisle and purchase denture cleaner tabs instead to save money. Yes, you read that correctly, denture cleaner tabs. The ingredients are the same in both types of products. Drop those into your reusable bottles and water storage bags and follow the directions, and you are ready to go. Pto Tip: I highly recommend not using scented dish soaps on flexible water storage containers like camelbacks or similar water bags. I have learned that the plastic and silicone they are made from can inherit the smell and taste, and it does not go away. 2. Chips can be used to start fires. When you go shopping for your camping trip, you most likely will have gotten a couple of bags of chips. When you are selecting your chips, the two kinds that are the most flammable are Fritos and Corn Chips. Any chip can be set on fire to help get your fire blazing, but Fritos and Nacho Cheese Doritos seem to work best. I am no scientist, but it has something to do with the amount of grease and the density of the chips. If you do not trust me, here is a video from my friend Dan, a Search and rescue (SAR) Expert and Scouter. 3. Camp Toilets Not every place you camp will have a toilet, or maybe those that do are closed for the season. Also, if you have kids, you know that they will not want to set foot anywhere near the stinky pit toilets. If this is the case, you can take several budget-friendly things with you that take up little to no space in your vehicle. Not everyone enjoys wandering the woods, digging a cat hole, and squatting. Here are a few ideas to help make things more comfortable. Product Options A privacy tent – easily found on Amazon. These are great and can be used for showers, changing, and going to the bathroom. Bucket toilet seats – These are seats that fit on top of a 5-gallon bucket. I suggest using a standard trash bag or biodegradable toilet bag to line the bucket to keep things clean for your travel home. Folding and collapsible toilets. Just as their name says, they make several different types of toilets that fold up or collapse down after use, allowing you to have a comfortable place to sit and utilize toilet bags. DIY Options Bucket with a pool noodle for the seat. – How To Video DIY folding chair or plastic chair toilets. – How to Video Build your own privacy tent using tarps and PVC pipes etc. Pro Tip: Bring some cheap kitty litter to dump into the bags to reduce the smell. 4. Zippered storage bags can be used for everything. They can keep electronics and valuables like keys and wallets dry. Store individual Ziploc bags full of food inside your cooler to keep the food from getting soggy from the melting ice, and you can keep leftovers, as well. Help keep things organized inside your vehicle, from snacks to gear. Use them to make omelets in a bag. 5. Pre Cook Your Meals While cooking at a camp can be fun and relaxing, some food can make large messes and require cleanup you are just not wanting to take the time to do. One option to help cut back on meal prep and cleanup is to pre-cook your food at home, and then when you get to camp, all you have to do is warm up, assemble, and enjoy. This will also help with concerns about raw meats and eggs going bad or not getting cooked well enough during the camping trip. Pro Tip: Freeze your pre-cooked meals before your trip and let them thaw in your cooler to help keep them cold and require you to carry less ice for the trip. 6. Egg Transportation Eggs are one of the hardest things to keep cold and safe while traveling. Here are a couple of ways to help you keep them safe for your camp meals. Egg holders keep them safe while camping Crack your eggs and store them in plastic to-go containers or even ziploc bags. You can also crack the eggs into plastic reusable bottles or even regular disposable water bottles. You can freeze them after cracking them open and place them in your containers. Make sure to leave room for expansion so they do not explode when frozen. 7. Freeze Water This seems like a silly item to discuss, but these tips can come in handy in many ways. Freezing Tupperware full of water – If you freeze water in Tupperware containers, you can use the ice and container as a homemade cooler pack. Then you can use the water for drinking once it melts and use the Tupperware for storage. Freezing water bottles – Buy bottles of water from the store and freeze them. Toss them in the cooler to be used as cooler packs and then drink them later. Pro Tip: Ensure the bottles and Tupperware are not full to the brim to allow the ice to expand to ensure they do not explode when freezing. Additionally, make sure to use still water and not fizzy water. How many of these โ€œhacksโ€ did you know about our use during your travels? Did I leave out any that you have learned that you find helpful? If so, I would love to have you leave them in the comments for everyone to learn about. As always, happy trails and stay adventurous, my friends.   [...] Read more...
May 12, 2023In my last story, I wrote about my two old Jeeps, some of our adventures, and how we got to today. To give you a better idea of the timeframe for those events, they occurred over the last 10 years. Fast forward to today, and you have probably guessed what vehicle was chosen as my newest adventure rig. I had considered getting another Jeep Wrangler and moving everything from my old one to the new one. However, I just felt time for a change. I went with a 4Runner because it would give me quite a bit more room, a smoother and quieter ride on highways, and they look cool. I was visiting a local dealer to look at a couple of Jeeps, and they had a couple of 4Runners on the lot. Based on cost, monthly payments, and the creature comforts, the ink was signed, and here we are. Introducing Finn. Why Finn, you ask? With the dark tinted windows, the black wheels, and that front grill, it looks like a Stormtrooper. Only one name came to mind, and that was Finn. The stormtrooper switched over to be a part of the rebellion. I did not feel we were the bad guys in our story, so it was better to side with the force than the dark side. When I got Finn, he had some big mud tires that were incredibly noisy, so those were the first things to be replaced with some All Terrains. From there, the side steps, roof rack, and tent. The clamshell tent was purchased prior to the Jeep dying. It had set in my driveway for several months before being installed. While waiting to install the tent, I set out to build the new interior. I removed the second and third-row seats and built a platform with storage. This allows for not only storage but a place to sleep/work if I end up in a place that requires me to stealth camp or the weather is not great. Here are a couple of after-shots. If you would be interested in a post about the build-out, let me know in the comments. Also, if you have questions about the build, I would love to chat with you about my build or any other aspects of truck camping and spending time on the road. And as always, happy trails and stay adventurous, my friends. Remember to find trip reports, favorite stops, and more on my substack. I also post quite a bit on Instagram as well. I would love to connect with you there and see where your adventures take you.   [...] Read more...
May 8, 2023I must start by explaining that I am not a gearhead or a car lover. While I enjoy my vehicles and see them as a form of freedom and mobility, I am not mechanically minded in the least, nor can I build something easily. So, with that said, all projects have been completed with lots of youtube watching and consulting of friends who are. When I think about it, everything all started with a crash. I purchased a 2010 Toyota Camry to replace the 1993 Camry that had gotten me through college. Sadly I did not have the 2010 Camry for very long. Within the first year of owning it, I had totaled it. Thankfully no one was hurt, but the accident was caused by a deer on a back road headed to visit family for a long weekend. The deer hit every part of the car’s passenger side, starting with the front bumper to the back, destroying the tail light. The damage was all cosmetic, but every panel down the right side of the car would have to be replaced. The vehicle survived and was driveable to get me to my familyโ€™s place and then back home to my place several days later. However, the insurance company determined that due to all the damage, it would cost much more to repair than to total it and pay it off. With a sum of cash in my pocket, the search had begun to find my next rig. I did considerable research and lots of list-making to determine what I was looking for, and of course, there was the budget. I was looking for something off-road capable with much higher clearance than a Camry. The goal was to use this vehicle as a traveling base camp for hiking and backpacking. I was also looking for something used that needed a little TLC but did not need a ton of mechanical work. I settled on a 1997 Jeep Cherokee. Lovingly named The Beast, it was temperamental, and getting it licensed was a bit of a journey. The short version of that story is that when I tried to get the new title, it came back saying that the vehicle still had a lean on it. The previous owners had paid it off, but the used car dealer they purchased it from had passed away, and the dealership had since been closed. They eventually got the paperwork they needed by contacting the widow of the gentleman who had sold the vehicle and owned the dealership. After months of back and forth, it was finally ready to hit the road. Little did I know the adventure was to come. Life had a massive change, and I found myself loading up the Jeep with as much as possible and getting rid of or donating the rest. Lilly, my dog, and I hit the road. We were moving to Arizona. I had been let go from my job, and other life events caused a need for a change, and opportunities fell into place to make it all happen. Many great trips and memories were made in the first couple of years living in Arizona and The Beast. That spring, I would drive to Utah for Outdoor Retailer, a massive media event put on by retailers who would be showing off their new gear for the season. Think of the big auto or home shows but a giant set of buildings full of all outdoor and adventure-related things. I had secured a media pass as a blogger and was even able to get my hands on some gear to test out for an upcoming trip.  Later that summer, I would drive right back through Utah and headed to Idaho for the first Hell Hike and Raft adventure. There I would meet some fantastic folks, and we would have an epic adventure backpacking In the Seven Devils Wilderness, leading us down into Hells Canyon to meet white water rafting boats at the river to then raft our way out of the canyon. The Beast was a workhorse but sadly started to have some issues. This was most likely due to the fact that it was just old and would need to have lots of factory parts replaced and the lack of upkeep by the previous owner. I needed a more suitable and reliable vehicle, especially since it would also be my daily driver and adventure vehicle. I loved the Cherokee, but I need and wanted more! Enter the Red Barron. A 2007 Jeep Wrangler. This truck had only one owner before purchase, a real estate agent in Tucson that had most likely never taken the soft top off, put it into 4-wheel drive, or had ever taken it on dirt. The interior and the engine looked like it had just rolled off the showroom floor. Do not worry. The Beast was renamed Betty White and was still driving around Tucson by a friend who has put lots of time, effort, and love into keeping it going. While it does not look the same, the heart is still there. The Red Baron and I would have many adventures. Many might think I drove it hard, but I was using it to its full potential. We took several cross-country road trips and many backroad adventures, and it was completely changed by the time I sold it. We camped and hiked all over the southwest, and in a blink of an eye, it looked like thisโ€ฆ. By the time of the picture above, I had added a roof rack, an awning and replaced the suspension. I even had a sleeping system inside the Jeep that utilized a special air mattress designed for Jeep Camping. Sadly my time in the southwest would end, and once again, I would load up the Jeep and drive across the country to a new home. Illinois is the new home base now, and since my arrival, the Jeep has continued to change with the removal of the rear seats, a platform was built, and a tent installed on the roof rack. The photo you see above is the first and only camping trip I was able to take with the newly completed interior sleeping/working area and storage. Shortly after this Trip, I went to get my mail on a normal uneventful day, and the Jeep did not want to start or run. I had it towed into town. The mechanics looked it over there, and the diagnosis of the engine was not good. Remember at the beginning of this email how I said I was not a mechanic? This is the time I had to make a choice. I did not have the skills, location, or tools to bring Red Baron back to life. The cost of repairs plus the high likelihood that other major parts would also start failing caused me to say goodbye and off he went to a nice couple of guys who worked for the state as mechanics a few hours away. While e have made it to the last chapter of this story it, however, will have to wait. until next timeโ€ฆ. Stay adventurous and happy trails!   [...] Read more...
April 17, 2023Just outside Florence, Arizona, a small town in Pinal County in southwest Arizona, sits a historic volcanic mound. Some might even call it a hill. However, if you are from the Midwest, it is much taller than just your average everyday hill. On top of that hill sits a 14-foot-tall masonry pyramid. Hikers can hike to the top to view the pyramid and the surrounding desolate desert for miles around.  The half-mile hike is fairly easy, with switchbacks leading up the mound’s side to the summit giving you a beautiful 360-degree view, but why is there a pyramid on top?  Arizona’s early years saw it full of some interesting and, dare I say, colorful individuals. One of these noted individuals is known as the “Father of Arizona”. Charles Debrille Poston was born in 1825 in Kentucky. He moved to San Francisco in search of gold and later became one of the first Americans to stake a claim in southern Arizona and New Mexico. He established the Sonora Exploring and Mining Company in 1856, which became one of the most successful mines in the territory. After convincing President Lincoln to split the territory into a separate entity, Poston also became Arizona’s first congressional representative in Congress. After his electoral defeat, Poston became involved in diplomatic missions and developed an interest in Zoroastrianism. He later attempted to build a Zoroastrian fire temple on top of Primrose Hill, which he believed was the site of an Apache temple to a sun god. Poston died in 1902 and was initially buried in a pauper’s grave, but his remains were later reinterred in a pyramid tomb built by the state government. Today, Poston Butte is managed by the city of Florence, Arizona, as a park. I hiked this trail many times when I lived close by. It was a great way to get some miles in and keep in shape. While the mileage was not very long, many folks would come out early in the mornings or late in the afternoon to hike it several times to get in their miles. I also enjoyed many moments staring off into the distance from the summit.  To learn more about this roadside oddity, please check out a couple of my favorite sites. Atlas Obscura and the Historical Marker Database.  These two sites, among a few others, are my go-to for information about all the weird and wonderful places  along the road.  Know Before You Go The trail is open from Sunrise to Sunset daily, and there is no fee to hike or park. Parking is at the edge of Hunt Highway in Florence, Az. Take plenty of water with you, and make sure to check the weather.  The hike is a half-mile from the parking area to the summit. The trail is well maintained but is natural and not paved.  Closest cities are Tucson and Phoenix, a little over an hour from each. Trailhead Address: 13993 W Hunt Hwy, Florence, AZ 85132, United States Location: 33ยฐ03โ€ฒ19โ€ณN 111ยฐ24โ€ฒ32โ€ณW   [...] Read more...
April 9, 2023The short answer is yes, and not buying them can be expensive.  If you are heading out into the outdoors, no matter where you are going, you need to research and find out if there are permits required to have before going. These could be day passes, annual passes, or lifetime passes, and everything depends on the location you are headed. Reading the fine print is extremely important. I found this out the hard way. When I was living in Tucson, a coworker and I decided to hike in a popular area in town. She had a pass that she thought transferred to any vehicle as long as it was visible in the car. We went for the hike and came back to a ticket for $70. Upon further inspection and reading the super fine print, it reads โ€œnot transferrable across vehicles.โ€ We both thought that was odd, considering she had paid for the pass and it was in the vehicle, but every place has its own rules. After this, I always make sure that you are looking up the places you are going and reading up on what passes and permits you might need. This post will get a little long, so bear with me. Not all places are the same, and not all permits work at all sites. An excellent example is that a different group might manage a campground inside of a park than manages the park itself. Many parks have chosen to utilize privatized campsite management; thus, additional fees will be required. While your park pass will allow you to enter the park and say that you have free camping with that pass, it only counts toward the privately managed campsites. Letโ€™s get into the depths of the different permits, shall we? Types of Outdoor Permits/Fees Federal Lands Permits Most commonly known as the โ€œAmerica The Beautiful Pass,โ€ National Parks Pass, or US Parks Pass. This yearly pass allows you to enter any national park or area managed by the national forest service, including National Forests, monuments, etc. This annual pass allows entry to 2,000 federal recreational sites for the owner and three additional adults. Depending on your age or if you are a veteran, you have access to special discounts such as a lifetime pass. Remember, youth under 16 are always admitted free to all parks. Check the US Parks Pass website for up-to-date pass pricing and promotions. State Land Permits State Land Permits are permits issued by state governments that allow individuals or organizations to use public lands for specific purposes, such as recreational activities or commercial operations. Additional licenses can be required for camping, hiking, hunting, fishing, logging, mining, or filming. State Land Permits are typically issued by the state agency responsible for managing the land, such as a state parks department, a forestry department, or a wildlife agency. The permits may have specific conditions or restrictions, such as limits on the number of people allowed in a particular area or requirements for waste disposal and environmental protection. The permit fees may vary depending on the type and duration of use. The funds generated from State Land Permits support the maintenance, conservation, and management of public lands and fund programs and projects that promote outdoor recreation and environmental education. State Land Permits are essential tools for state governments to manage and protect public lands, ensuring those lands are used responsibly and sustainably and benefit both the people and the environment. Local / County Permits Like each state, specific permits are only good in certain areas. Checking in with local DNR and Conservation departments will help provide you with all the information you need for the site you are going to. I have never met anyone who does not love to tell you about the great things in their area. I ask them about their favorite places to eat and the best places to get groceries or gas. Local rangers and agents will know the most up-to-date information. Calling saves you a lot of time. Park Permits and Passes Many national and state parks require park permits and pass to access certain areas or participate in specific activities. These permits and receipts may be daily, weekly, or annual, and additional fees might be charged if you are for camping, fishing, boating, and hiking activities. The fees for these permits and passes help support the park’s maintenance and preservation. In addition to allowing access to designated areas and activities, park permits and receipts may also offer discounts on camping and other services. Researching and obtaining the necessary permits and passes before visiting a park is essential to avoid fines or restrictions on activities. Visitors can enjoy parks’ natural beauty and recreational opportunities by getting the appropriate permits and passes while supporting their continued maintenance and conservation. Campground Fees Camping sites charge campground fees to cover maintaining and operating the facility. The fees are used to support the campground’s infrastructure, including restrooms, showers, and campsites, as well as to provide amenities such as fire rings, picnic tables, and trash disposal. These fees vary depending on the location and type of camping, such as tent camping, RV camping, or backcountry camping. Campground fees may also vary depending on the season, with peak season fees being higher than off-season fees. Many campgrounds offer reservations for a specific campsite or type of camping. While campground fees may seem like an additional expense, they allow visitors to enjoy the outdoors safely and comfortably while supporting the preservation and upkeep of natural areas. Hunting and Fishing Licenses Hunting and fishing licenses are permits that need to be purchased by many states and countries to engage in these activities legally. The license fees help support the conservation and management of wildlife populations and their habitatsโ€”hunting licenses for individuals who wish to hunt game animals such as deer, elk, and waterfowl. In contrast, fishing licenses must be acquired by individuals who want to fish in designated waters. By obtaining these licenses, hunters, and anglers can legally and responsibly engage in these activities while supporting the conservation of the natural resources they rely on. Camping Permits The permits you need to go camping depend on the location and type of camping you plan. Many campgrounds require reservations or licenses for specific campsites, especially during peak season, and may charge fees for these reservations. Backcountry camping, which involves camping in undeveloped areas away from established campgrounds, may require permits to ensure that camping is done responsibly and to limit the impact on natural resources. Some parks and wilderness areas also require hiking, fishing, and hunting permits. It is essential to research the specific regulations and requirements of where you plan to camp and obtain any necessary licenses or reservations to avoid fines or restrictions on activities. By bringing the appropriate permits and reservations, you can enjoy the outdoors safely and responsibly while supporting the preservation and upkeep of natural areas.  Backcountry Camping Permits Backcountry camping permits are permits required by many parks and wilderness areas for camping in undeveloped areas away from established campgrounds. The permits help to ensure that camping is done responsibly and to limit the impact on natural resources. These permits are typically required for overnight stays in designated backcountry camping areas and may be limited in number to protect the environment. The fees for these permits vary depending on the location and length of stay and may also include additional costs for group size or other activities, such as hiking or fishing. Some parks and wilderness areas may also require hiking, fishing, hunting, and backcountry camping permits. By obtaining these permits, backcountry campers can legally and responsibly enjoy the wilderness while supporting the conservation and management of natural resources.  RV Camping Fees  RV camp fees are charges assessed by RV parks and campgrounds for using their facilities. These fees can vary depending on various factors, including location, amenities, and the season. Some campgrounds may offer different types of sites, such as those with full hookups or access to water and electricity only, each of which may have separate fees. Many campgrounds also offer additional amenities, such as laundry facilities, swimming pools, and Wi-Fi, which may incur additional charges. In addition to nightly fees, some campgrounds may also charge reservation fees or fees for other guests. RV camp fees can offset the costs of maintaining and operating the campground, including utilities, maintenance of facilities, and staff salaries. By paying RV camp fees, visitors can enjoy a comfortable and convenient camping experience while supporting the preservation and upkeep of natural areas. Special Use Fees Special Land Use Fees refer to fees charged by local governments or other law enforcement agencies for using certain land or property requiring special consideration or regulation.  These agencies may charge fees for using land for offroad vehicles, fire permits, and backcountry camping. The fees cover maintaining and planning the land and funding environmental mitigation or restoration. The fee may be calculated based on the size of the land, the proposed use, and the degree of impact on the surrounding community. Special Land Use Fees can be an essential tool for local governments to manage land use. Resources For Permit Information USDA/Forest Service The USDA and Forest Service sites provide a breakdown of what kinds of passes are needed and free days for all federal lands. National Park Service The NPS provides a section on its website that covers the different types of passes and where you can get them, along with links to additional information. Google Yes, it is a very broad resource, but if you type in the state and then permit or pass, it will help you find the correct office and information for that state or area. If you are doing a specific activity that might require additional passes or permit type, that will also provide additional info. State National Resources and Conservation Departments Every state has its name for these departments, but they all have them. A quick Google search will help point you in the correct direction. State Park and State Natural Area websites If you know the name of the park, you will visit that park or natural areaโ€™s website, and it will outline all of the specific fees and permits for that park but also give you access to all the parks and places in the state as well.    Now that you know all the ins and outs of permits, you should be all set for your next adventure.  As always, happy trails and stay adventurous.    [...] Read more...
March 30, 2023Woke up to snow on the ground, a surprising sight I was not ready for. I am quite ready for spring to be here but this snow is a sign that winter is not quite ready to leave. Todayโ€™s plan is to hop in the truck and head out to a local trail on the northeast side of town. A bit of a drive for me, but I do love a good drive. The morning was clear and crisp and perfect for a stroll down an unknown trail to me. I was up early enough that the roads were empty and still had frost and snow covering them before the sun hits them. Arriving at Carpenter Park I met up with my friend and we explored the shelter close to the entrance to the park. Several fat robins greeted us while wandering around looking for food. Seeing robins in the Midwest is one of my favorite signs that spring is right around the corner. The Trail was dusted with snow and we were the first to leave footprints on this particular morning. The air was clean and crisp, a smell one can only find on a super clear winter day. Similar to that of an incoming rain storm that post-snow clear air smell is amazing. I am sure there is science behind why this happens, but instead, I will just enjoy the little moments and not concern myself with the why of it today. The trails here are all loops so there was no chance of getting lost so we wandered around deep in conversations and enjoying the frozen landscape. We found frozen deer tracks and tracks from what looked like a whole raccoon family visiting a stream that was flowing quite quickly. Lots of places that would have been great hiding spots we would have used in our youth. We found our way to an overlook of the river that runs on the outskirts of the park. Standing and watching the water rush past I pondered what this park and area across the river would look like when the trees and plants were in full bloom and not in their brown and bare winter states. We did not hike many miles or go great distances but our goal was just to get outside and enjoy the last lingering bit of winter. Spring is right around the corner or so I hope it is anyway. May your spring be filled with outdoor adventures and many breaths of clean fresh spring air. Until next time happy trails and stay adventurous. Adam   [...] Read more...
March 17, 2023I am going to jump straight to the answer and save you all time. The answer to the question of which is better a cooler, an electric cooler, or a fridge? The answer might shock you…. ….. whatever you feel the most comfortable using and whatever you have will work just fine.  I said what I said I will stick to it. There is no better answer for anything gear related than this. I have considerable experience testing and selling outdoor gear and I would always use that answer even when working for the gear shop. The gear shop was about selling gear but also training and educating. It is all about those repeat sales.  To this day family and friends constantly ask me which product should I buy if I wanted to go do X.   Many times it shocks them that I suggest going to Walmart, Target, dicks sporting goods, or any big box chain that you have close by and buying what they have.  If it is a backpack, shoes, boots, or something you will be wearing test the products out.  Do more than just walk around the store for 5 min. Take them home and wear them around the house for a few days to ensure comfort and fit.  Many stores have decent return policies just make sure to ask what that is and follow them. When  I was working at the gear shop we would take back just about anything except underwear as long it was clean and never used outside.  My tried and true gear method has always been to buy something, use something, retire it, and get something that can serve me better than the item before.  I have camped many weekends using coolers of every kind even the grocery store styrofoam ones. Did they work for their intended applications and for the time needed, absolutely!  It was not until I was spending more than a couple of days in the camp that I began to realize that the one thing that always caused issues was ice.  I tried using the freezer blocks but Ice always seemed to work the best in coolers especially in the southwest or in the midwest in the summers. The Reasons why I switched from a cooler to a fridge:  Soggy food. Accidental messes with water. Loss of space from freezer blocks and packs.  Much less of a chance for spoiled food or drinks. Ice melts and what do you do with the water? Peace of mind about raw meats or products causing sickness while on the road.  Sure there are methods of keeping this from happening but my greatest concern was less about the soggy food and more about a drastic change in temperature that might cause the items in my cooler to spoil leaving me with a need to have to head home early or go into a town to stock up on groceries again.  Living and camping in the southwest also made things interesting while coolers would work for a day or two anymore past that an ice run was needed.  I made the switch to the fridge based on temperature control honestly.  While driving it is powered by the vehicle and then by a battery when parked/camping. The last thing I want is a dead vehicle battery after a weekend of camping.  Quite a bit of research was done prior to purchasing the fridge. I did spend a considerable amount of time watching youtube videos, reading reviews, and shopping around at prices. I eventually settled on a smaller-sized fridge but works well for me.  Products I have used/suggest Alpicool CF35 compact vehicle fridge  35L Ozark Trail Coolers – various sizes  Coleman Insulated Portable Thermoelectric Cooler – 40qt Set Power Fridge Slide  Each product has its own pros and cons but they all worked great for their intended uses when used. Each also served a purpose at their price points and there are no regrets about using any of them looking back.  I suggest that you do research on each product prior to buying them.  Disclosure: This is not a product review nor was any of the products used in this post provided to me as a gift. All items were purchased with my own money.  This post uses affiliate links. Purchases made using these links help keep the lights on around here. Thanks for your help!    [...] Read more...
February 26, 2023Are you planning your first camping trip with friends or have you been invited to go on a camping trip in the near future? I am sure your friends and family have bombarded you with tons of information on what products to buy. If you are not sure if you will even like camping here are ten tips to help you get ready for your first camping trip. 1. Barrow or rent the big expensive pieces of gear. Ask your family or friends and I am sure that they have the gear to loan you for the weekend. Also, ask around work as there might be someone there that is an avid camper that is willing to help out. You can also rent gear from places like REI, your local gear shop, or even the local universities (if you are currently enrolled). Renting equipment will allow you to save money and in the event, you do not like camping you can return it after the trip and never see it again. 2. Buy discounted or inexpensive gear. Going camping does not mean you need the latest and greatest name-brand gear. You simply need a tent or hammock that will keep you dry during a storm, a sleeping bag to keep you warm, and a backpack if you are going backpacking. No one is going to judge you by what you have and if they do then those people are not people who truly understand the love of camping and the outdoors.  Shopping at places like Walmart, REI Outlet, Backcountry, or even your local used sporting equipment store. 3. Research where you are going. Knowing where you are going ahead of time will help you plan how you pack and what gear you need. Knowing the area will also help you understand what kind of area you will be camping in.  The biggest issue you might have is showing up and not finding a campsite because they are all full. Make sure that you or your group makes reservations if they are available. If not have a backup plan if the campsite you wanted to stay at is full for the weekend. 4. Get to know the gear you have. If you are renting or borrowing gear you will still need to know how to use it before you go on your trip. Set up the tent, pack the backpack, and put it on before going. You can even watch youtube videos about the products in advance. This will help you feel more comfortable with not only the products but also with using them for the first time. 5. Always take a little extra just in case. It never hurts to take a little extra with you on your first camping trip. If you are backpacking this might cause a little bit more of a challenge than car camping. With car camping, you can take as much as you can fit into the vehicles. Spare socks, underwear, and other clothing can help keep you warm if the weather ends up being colder or wetter than you expected. Also having a few extra luxuries from home to help keep you comfortable can also be taken. There are lots of other helpful tips and tricks that you can learn from your friends, and family, and online to help your first camping trip go smoothly. What tips or tricks did you learn on your first camping trip that could help?   [...] Read more...

Start Here

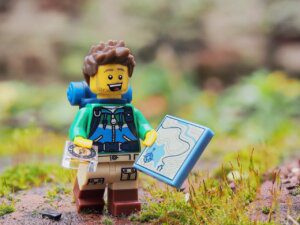
Learn about this site, Adam’s passion for the outdoors, his many adventures, and where it all started.


Adventures

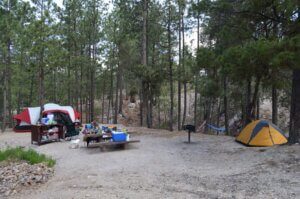
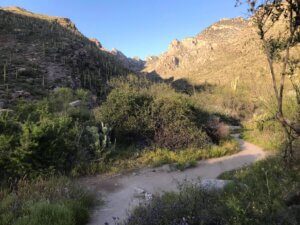
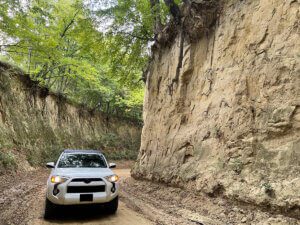
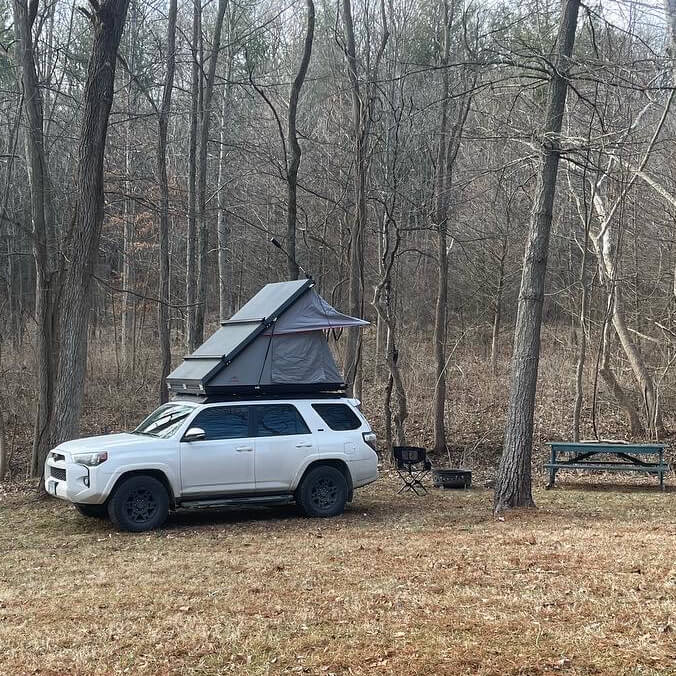
Wander with us as we tour all over the US and abroad. Ghost towns to weird roadside stops and everything in between.


The Gear

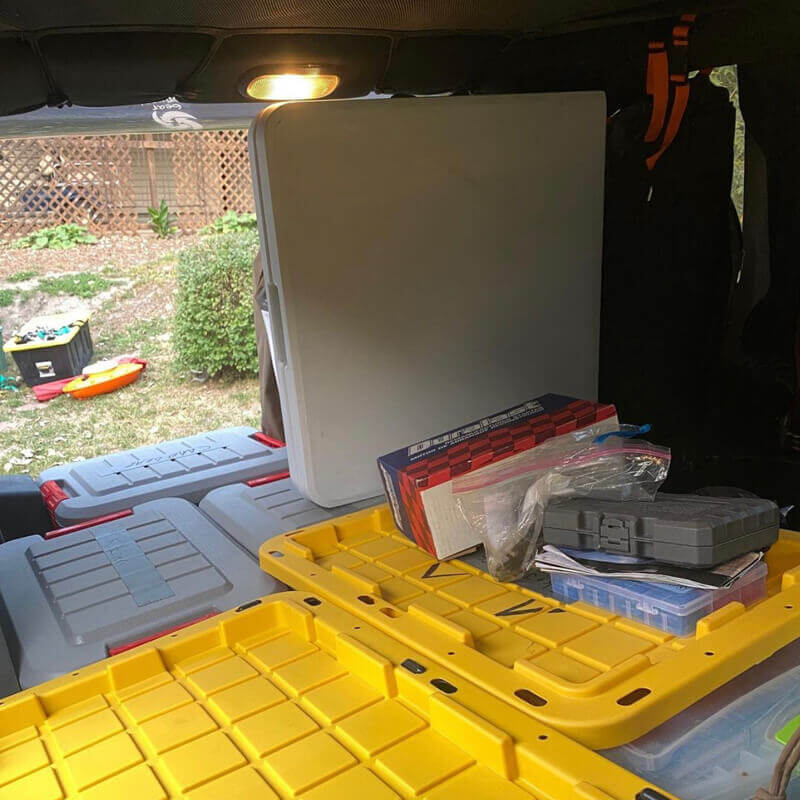
I share the essential gear I use on my adventures, from tents and sleeping bags to kitchen essentials and more.


What is Wander The Road?

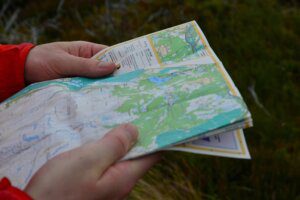
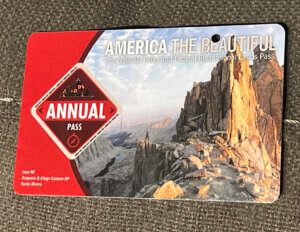
Wander the Road is a website dedicated to helping people plan and execute their dream road trips. We provide comprehensive guides on everything from choosing the right vehicle to packing the perfect road trip kit. We also offer a variety of resources, such as maps, itineraries, and travel tips. Whether you’re a seasoned road tripper or a first-timer, we have everything you need to plan a successful and unforgettable journey.

At Wander the Road, we believe that road tripping is the best way to see the world. It’s a chance to escape the hustle and bustle of everyday life and explore new places at your own pace. We want to help you make the most of your road trip, so we provide you with all the information you need to plan a safe, efficient, and enjoyable journey.